


More Than Just a Hamstring Stretch
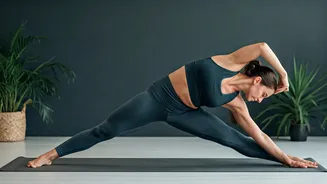
While Extended Triangle Pose is celebrated for its ability to release tight hamstrings, its benefits extend throughout the entire body. This standing posture provides a deep stretch for the hips, groin, and calves. [2, 6, 9] It also works to open up and expand
the chest and shoulders, which can help improve posture and allow for deeper breathing. [9, 15] Furthermore, Utthita Trikonasana strengthens the thighs, knees, and ankles while toning core muscles and stimulating the abdominal organs, which can aid in digestion. [2, 6, 12] By integrating this pose into your routine, you’re not just targeting one area of stiffness; you’re engaging in a movement that promotes full-body alignment, stability, and balance. [9, 15]
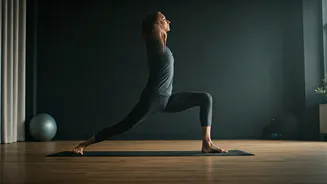
Your Step-by-Step Guide
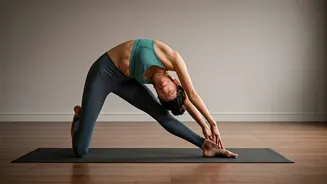
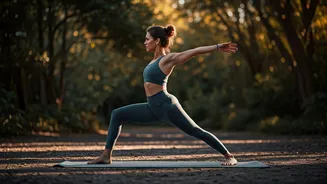
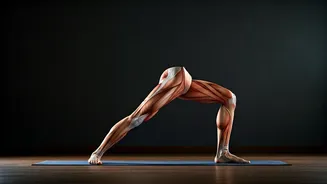
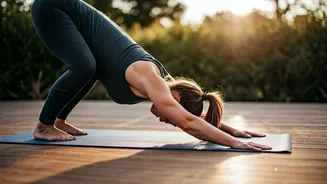
To practice Extended Triangle Pose, start by standing on your mat and stepping your feet about 3.5 to 4 feet apart. [6] Raise your arms parallel to the floor, reaching them out to the sides. Turn your right foot out 90 degrees so it points to the front of the mat, and turn your left foot in slightly. [3] Align the heel of your right foot with the heel or arch of your left foot. [6, 7] As you exhale, extend your torso to the right, bending from the hip joint, not your waist. [6, 22] Reach your right hand down toward your shin, ankle, or a yoga block placed by your foot. [6, 23] Extend your left arm toward the ceiling, creating a straight line with your right arm. [22] You can turn your head to gaze up at your left thumb, look straight ahead, or down at the floor, depending on what feels most comfortable for your neck. [6, 22] Hold the pose for 30 to 60 seconds before inhaling to rise back up. [22] Reverse your feet and repeat on the other side. [6]
Fine-Tuning Your Form
Proper alignment is key to maximizing benefits and preventing injury. Actively press through the outer edge of your back foot to create a stable anchor. [7] Engage the muscles in your front thigh to support the leg, but be careful not to lock or hyperextend your front knee; keep a micro-bend in the joint. [7, 24] The goal is to lengthen both sides of your torso equally, avoiding the common tendency to crunch the bottom side. [8, 22] Think about rotating your chest open toward the ceiling and keeping your shoulders stacked one on top of the other. [2] Your core should be engaged to help maintain balance and stability throughout the pose. [12]
Common Mistakes to Avoid
One of the most frequent mistakes is rounding the spine in an effort to touch the floor. [8] It's more important to keep the spine long and straight. If you can't reach the floor without compromising your form, use a yoga block for support. [4, 8] Another common error is placing too much weight on your bottom hand. [24] This hand should rest lightly, with the strength to hold the pose coming from your legs and core. Also, avoid bending from the waist instead of the hip. [20, 21] The movement is a sideways hinge from the hip joint, which allows for a deeper, safer stretch.
Modifications for Every Body
Yoga is about adapting poses to fit your body, not forcing your body into a pose. If you have very tight hamstrings, placing your hand on your shin or a block is a great way to start. [3, 4] You can also practice with a slightly bent front knee to reduce the intensity of the hamstring stretch. [4] For those with balance challenges, practicing with your back against a wall provides excellent support and helps you understand the alignment. [1, 4] If you experience any neck strain when looking up, simply keep your gaze forward or down at the floor. [6] People with high blood pressure are often advised to keep their gaze downward, while those with certain heart conditions can practice against a wall and keep their top hand on their hip. [6, 10]