


Finding the Perfect Canvas
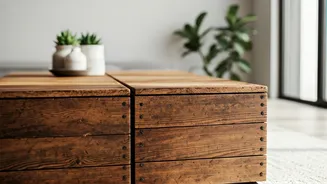
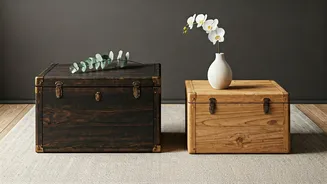
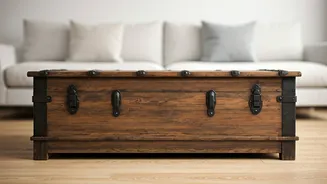
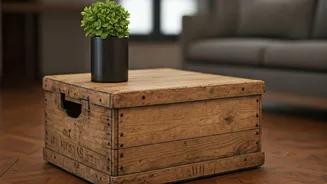
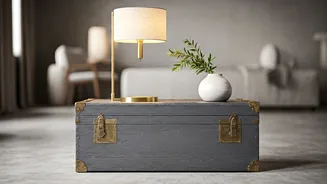
The heart of this project is the box itself. Forget flimsy fruit crates; you’re looking for something with history and structure. Old ammunition boxes, wooden bottle crates, or small vintage trunks are ideal candidates. Scour flea markets, antique shops,
and online marketplaces. Look for solid wood construction, interesting joinery like dovetail corners, and a size that complements your sofa—typically no higher than the seat cushions. The 'weathered' part is good—it adds character—but avoid anything with active rot, mould, or significant structural damage. Your goal is a box with good bones that tells a quiet story.
The All-Important Prep Work
A professional finish begins with thorough preparation. First, give the box a deep clean. A solution of mild soap and water with a soft-bristle brush works well. Make sure to get into all the nooks and crannies, removing decades of dust and grime. Let it dry completely for at least 24 hours. Next, inspect the surface. If the original paint is chipping, you may need to sand it down. A word of caution: old paint, especially from pre-1970s items, can contain lead. If you suspect lead paint, use a wet sanding technique and wear a proper respirator mask to minimise dust. For a smooth, minimalist look, a light sanding with medium-grit sandpaper will rough up the surface just enough for paint or sealant to adhere properly. Don't skip this step; it's the difference between a DIY project that looks 'homemade' and one that looks like a designer piece.
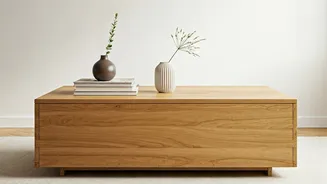
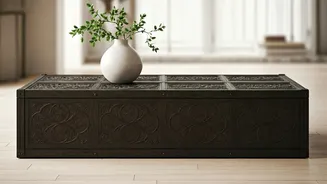
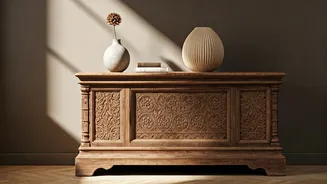
Achieving the Minimalist Look
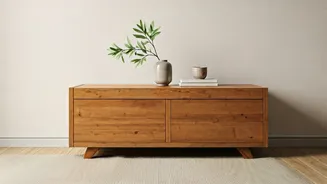
This is where you marry 'vintage' with 'minimalist'. The key is simplification. You have two main paths. The first is paint. To achieve a modern aesthetic, choose a high-quality chalk paint or a matte finish latex paint in a single, bold, neutral colour—think charcoal grey, deep navy, or a crisp off-white. This solid colour will unify the piece, making the box’s shape the hero, not its weathered pattern. The second path is to celebrate the wood itself. If the box has beautiful grain, consider stripping off any old varnish and applying a clear, matte-finish sealant. This protects the wood while keeping the look natural and understated. Glossy finishes tend to look dated and busy, so a flat, non-reflective surface is your best bet for a truly minimalist feel.
Choosing the Right Foundation
A box on the floor is just a box. Adding legs is what transforms it into a coffee table. The style of leg you choose will cement the minimalist aesthetic. Hairpin legs are a classic choice for a mid-century modern vibe; their slender profile creates a sense of airiness and light, making the box appear to float. For a more industrial or Scandinavian look, consider simple, tapered wooden legs mounted at a slight angle. Alternatively, low-profile locking casters (wheels) can add a functional, industrial edge while making the table easy to move around—a huge plus in a small apartment. When selecting legs, consider height. The total height of your table should be a few inches lower than your sofa's seat for comfortable use.
Assembly and Finishing Touches
Now, bring it all together. Turn your finished box upside down on a soft surface to avoid scratching your work. Measure and mark the positions for your legs, ensuring they are equidistant from the corners for stability and visual balance. If you're attaching legs to a thinner base, it's wise to add a small block of reinforcing wood on the inside of the box for the screws to bite into. Drill pilot holes to prevent the old wood from splitting, then securely screw the legs into place. Flip it over and admire your work. For the final touch, apply two to three thin coats of a water-based polyurethane in a matte finish to the top surface. This will protect your table from spills and coffee cup rings without adding any unwanted shine, preserving the clean, minimalist look you worked so hard to create.