


The Allure of Velvet and Glass
There’s something captivating about velvet-leaf philodendrons. Varieties like the iridescent Philodendron Micans, the dark and dramatic Melanochrysum, or the striking Splendid have become crown jewels for indoor gardeners in India. Their leaves have a unique,
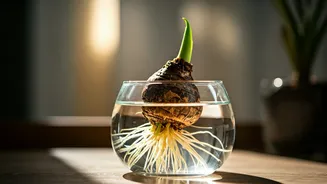
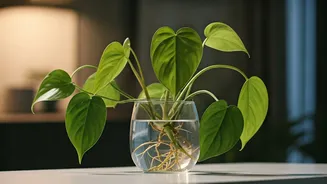
soft texture that beautifully catches the light. The 'rare' tag adds to their desirability, making them a prized possession. The current trend takes this appreciation a step further by putting the entire life cycle on display. Propagating these beauties in clear glass vessels turns a simple gardening task into a living art installation. It combines the thrill of cultivating a rare plant with a minimalist, scientific aesthetic, allowing you to watch the magic of root development day by day. It’s a slow, rewarding process that feels both modern and elemental.
Why Water Propagation Works So Well
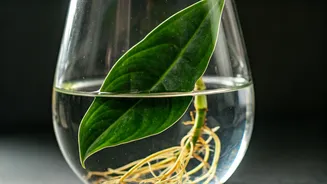
For many beginners, propagating in soil can feel like a guessing game. Is it working? Is it rotting? Water propagation removes that mystery. Philodendrons, as part of the aroid family, are particularly well-suited to this method. Their stems contain nodes—small bumps where new leaves and roots emerge. When a cutting with at least one node is placed in water, it triggers the plant’s natural response to grow roots in search of nutrients. The water provides hydration, and the transparency of the glass allows you to monitor progress easily. You can spot new root growth within a week or two, a gratifying sight that confirms your efforts are paying off. It's a lower-risk method for precious cuttings, as you can quickly spot any signs of rot and intervene before the entire cutting is lost.
Step 1: Taking the Perfect Cutting
Your success starts with a healthy cutting from a thriving mother plant. Don’t be intimidated; it’s a simple snip. Look for a healthy vine with several leaves. Using a clean, sharp pair of scissors or pruning shears, make your cut about a quarter-inch below a node. The node is the most critical part, as this is where the new roots will sprout. A good cutting will typically have one to three leaves and at least one node. If your cutting has an aerial root—a small, brown root already growing from the node—even better! This gives your propagation a head start. Avoid taking cuttings from old, woody stems or from vines that look weak or discoloured.
Step 2: Preparing the Cutting and Vessel
Once you have your cutting, a little preparation is needed. Gently remove any leaves on the bottom of the stem, especially the leaf closest to the node you’ll be submerging. This is important because leaves left underwater will rot,
Step 3: Placement and Patient Care
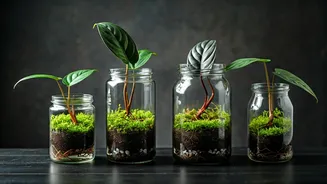
Place the prepared cutting into the vessel, ensuring the node is fully submerged but the remaining leaves are well above the waterline. Now, it's all about location and patience. Place your glass vessel in a spot that receives bright, indirect sunlight. A north-facing window or a spot a few feet away from an east-facing one is ideal. Direct, harsh sunlight will scorch the leaves and can promote algae growth in the water. The most important maintenance task is to change the water every three to five days. This replenishes oxygen and prevents the buildup of bacteria that can cause the stem to rot. Simply tip out the old water and refill with fresh, room-temperature water. Then, you wait. In a week or two, you should see fine, white roots beginning to emerge from the node.
Step 4: Transitioning from Water to Soil
This is the final, crucial step. Once your cutting has developed a healthy root system—at least an inch or two long—it’s ready to move to its permanent home in soil. Don't wait too long; roots that grow accustomed to water can have a harder time adapting to soil. Choose a small pot with drainage holes and fill it with a well-draining potting mix. A mix of cocopeat, perlite, and compost works wonderfully for philodendrons. Make a small hole in the centre of the soil, gently place the rooted cutting inside, and backfill, carefully covering the roots. Water the plant thoroughly and place it back in its spot with bright, indirect light. Keep the soil consistently moist (but not waterlogged) for the first few weeks to help the new roots acclimate.