





Forget fleeting trends and expensive decor. Creating a stunning, high-impact feature wall is more accessible than you think, thanks to the timeless art of origami. This is your guide to transforming simple paper into sophisticated geometric art.
The Power of the Pattern
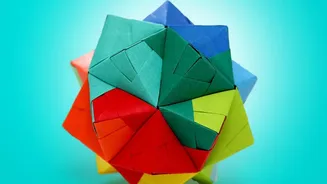
The secret
to large-scale origami wall art lies in a technique called modular origami. Instead of folding one massive, complex piece, you create multiple identical units, or 'modules', and join them together to form a larger pattern. This approach makes ambitious projects manageable and opens up a world of geometric possibilities. By repeating a single, simple shape, you can build intricate and visually striking designs, from flowing tessellations to bold 3D structures. The repetition creates a sense of rhythm and complexity that is both calming and captivating, turning a blank wall into a focal point.
Choosing Your Foundational Shape
Your journey begins with a single fold. The shape you choose for your module will define the entire artwork. For beginners, the 'Sonobe' unit is a fantastic starting point. It is a versatile parallelogram-shaped module that can be interlocked to create cubes and other geometric forms. Other popular options include simple pyramids, hexagons, and diamonds, each offering a different aesthetic. A pyramid array can produce a spiky, three-dimensional texture, while interconnected hexagons create a honeycomb effect that is both modern and organic. Before you commit, fold a few test units to see how they feel and how they connect with one another.
Selecting the Perfect Paper
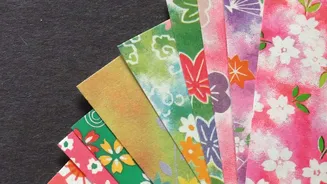
The paper you choose will influence the final look, feel, and durability of your art. While you can start with standard printer paper, investing in quality paper pays off. 'Kami', the classic origami paper, is an excellent all-around choice for beginners; it's thin, crisp, and comes in countless colours. For more structural or larger pieces, a slightly heavier paper between 120 and 170 gsm (grams per square metre) will provide more stiffness and durability. Consider using textured paper like 'Tant' or traditional patterned 'Washi' or 'Chiyogami' to add another layer of depth and personality to your design. Don't be afraid to mix colours to create gradients or bold, contrasting patterns.
The Art of Assembly
Consistency is key. For a seamless pattern, every module must be folded with precision. Use a bone folder or a ruler to make your creases sharp and exact. Once you have a collection of modules, the assembly begins. Many modular designs are self-locking, meaning the units cleverly tuck into one another without the need for adhesives. For other designs, especially 3D shapes like pyramids that will be mounted flat, a small dab of PVA or craft glue on the inside seams will help each unit hold its form securely before you arrange it.
Planning and Mounting Your Masterpiece
Before attaching anything to the wall, plan your layout. You can arrange your modules on the floor or use paper templates taped to the wall to visualise the final composition. This allows you to experiment with spacing and flow until you find the perfect arrangement. When it's time to mount, you have several options depending on the weight of your piece and your wall type. For lightweight paper art, removable mounting putty or double-sided tape can work well. Another damage-free method involves placing small steel thumbtacks in the wall and using tiny, strong magnets to hold the paper in place over the tack. For a more permanent or professional finish, you can glue the assembled piece to a backing board and frame it.