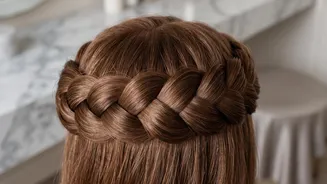



The halo braid, also known as a crown braid, is a timeless hairstyle that radiates elegance. Once reserved for special occasions or salon visits, this regal look is surprisingly achievable at home, offering a chic updo without the high cost.
Get Started: Prepping for Braid Success
Before you
start braiding, a little preparation goes a long way. This style works best on hair that isn't freshly washed, as the natural oils provide better grip. If your hair is clean and slippery, add a spritz of dry shampoo or a texturizing spray at the roots for volume and hold. Detangle your hair completely with a brush or wide-tooth comb. Have your tools ready: a few clear elastics and several bobby pins that match your hair colour will be your best friends for securing the style. For many of these styles, the easiest method involves parting your hair down the middle, creating two separate braids, and then wrapping them around your head. This two-braid technique is often called a 'milkmaid braid' and is a fantastic starting point for beginners.
1. The Classic Two-Braid Crown
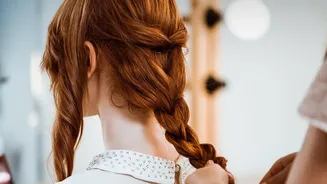
This is the quintessential halo braid and the most beginner-friendly version. After parting your hair in the middle from front to back, create a simple three-strand plait on each side, starting just behind the ear. Secure each braid with a clear elastic. Gently pull on the edges of each braid to 'pancake' them, creating a fuller, more voluminous look. Then, lift one braid and lay it across the top of your head like a headband, pinning it securely on the opposite side. Bring the second braid up to meet it, tucking the end of the first braid underneath it. Pin the second braid in place, making sure to hide both elastics for a seamless finish. This method is especially effective for shoulder-length to long hair.
2. The Dutch Braid Halo
For a more pronounced, three-dimensional crown, the Dutch braid is your go-to. Unlike a French braid where you cross strands over the middle, a Dutch braid involves crossing them under. This technique makes the braid sit on top of the hair, creating a bold, raised effect. You can create this look with a single, continuous braid that you work around the entire hairline, or use the simpler two-braid method. For the two-braid approach, create a Dutch braid on each side of your head. Once braided, gently loosen the plaits for a softer, more romantic feel before wrapping and pinning them across the crown as you would with the classic style.
3. The Half-Up, Half-Down Halo
If you love the look of a crown braid but want to show off your hair's length, the half-up halo is the perfect compromise. This bohemian-inspired style is quick and works well on most hair lengths. Start by sectioning off the top half of your hair. Divide this section into two, and create a braid on each side, either a simple plait or a more intricate fishtail or Dutch braid. Wrap the two braids around the back of your head and pin them, leaving the rest of your hair to flow freely. For a softer look, start with wavy or curled hair and leave a few face-framing tendrils out in the front.
4. The Messy, Deconstructed Halo
Perfectly imperfect, the messy halo braid is all about effortless, romantic texture. The key here is to embrace flyaways and softness. Create a classic two-braid crown, but before you pin the braids up, pull them apart generously to create significant volume and an almost-undone look. When you pin the braids, don't aim for perfect symmetry. Allow some pieces to fall out and frame your face. You can even use a twisting technique, called a rope braid, instead of a standard three-strand braid for a different texture. This style is ideal for second or third-day hair and exudes a relaxed, bohemian vibe.
5. The Faux Halo with a Bun or Ponytail
This clever variation gives the illusion of a full halo while being incredibly quick to execute, and it's a great option for those who struggle with wrapping a continuous braid. Start by creating a lace braid—a type of French or Dutch braid where you only add hair from one side—along your hairline, starting from your part and working towards your ear. Continue this into a regular braid. Gather the rest of your hair, including the tail of your braid, into a low bun or ponytail at the nape of your neck. You can also create two braids at the front and wrap them around a pre-made bun. This style provides the elegance of a crown with the practicality of a simple updo.