

Gathering Your Simple Supplies
You don’t need a sprawling garden to become a successful grower; a sunny windowsill is your entire farm. Before you start, gather a few basic items. You will need two growing trays that fit on your windowsill (one with drainage holes, one without), enough
quality potting soil or coconut coir to fill a tray about 3 cm deep, a spray bottle for watering, and, of course, black oil sunflower seeds. Ensure your seeds are specifically intended for sprouting or microgreens to guarantee they haven't been treated with fungicides.
Step 1: Soaking the Seeds
The first step to a bountiful harvest is waking up your seeds. Place your desired amount of sunflower seeds in a jar, cover them with cool water, and let them soak for about 8-12 hours, or overnight. You'll notice them plump up as they absorb water. After soaking, drain the water completely and give the seeds a good rinse. This initial hydration is crucial for kickstarting the germination process and ensuring an even sprout rate across your tray.
Step 2: Sowing for Success
Now it's time to get your hands dirty. Fill your tray that has drainage holes with your pre-moistened potting mix, lightly compacting it and smoothing the surface. Spread your soaked and rinsed sunflower seeds evenly across the soil. You want a dense layer, with seeds touching but not overlapping too much. Gently press the seeds into the soil to ensure good contact. Give them a final misting of water with your spray bottle before moving to the next stage.
Step 3: The Blackout Period
For the next few days, your seeds need darkness and weight. This mimics being buried under soil, encouraging strong root growth. Water the tray well, then cover the seeds with the second, empty tray placed upside down. You can even add a small weight on top, like a book or a small stone. This 'blackout' period typically lasts 3-4 days. Check on them daily, misting with water to keep the soil moist but not waterlogged. You'll soon see tiny white rootlets emerging.
Step 4: Introducing the Light
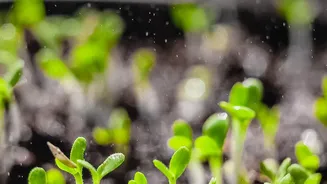
Once your sprouts have pushed up the top tray by about an inch, it's time for their debut in the sun. Remove the cover tray and place your microgreens on a sunny windowsill. For the first day, it's best to introduce them to indirect light to avoid shocking them. After that, they will thrive in direct sunlight. Water them once a day from the bottom by placing the growing tray into the solid tray filled with a little water. This encourages roots to grow downward and helps prevent mold on the surface. Within days, you’ll see the shoots turn a vibrant green.
Step 5: Harvesting Your Greens
Your sunflower microgreens are typically ready to harvest in about 10 to 14 days from sowing. The perfect time is when their first set of leaves, known as cotyledons, have fully opened and turned a deep green. You might see the beginnings of the 'true leaves' starting to form, which look different from the initial pair. To harvest, use a sharp pair of scissors or a knife to cut the stems just above the soil level. It is best to harvest them as needed right before you plan to eat them to maximize freshness and nutrient content.
A Nutritional Powerhouse
That small harvest packs a significant nutritional punch. Sunflower microgreens are a fantastic source of vitamins A, B complex, E, and K. They also provide essential minerals like calcium, iron, and magnesium, which support everything from bone health to immune function. Furthermore, they contain healthy fats and are a complete protein source, meaning they provide all the essential amino acids your body needs.