


Why Upcycle Old Brass?
Before you begin, let’s appreciate why this is such a rewarding project. Old brass cookware, common in many Indian homes, possesses a character that new items simply can't replicate. The warm, golden hue, whether polished to a brilliant shine or left
with its distinguished dark patina, creates a beautiful contrast with lush green foliage. Upcycling these pieces is not just about sustainability; it's about honouring your family's history. Instead of letting a piece of your heritage gather dust, you can transform it into a vibrant centrepiece that tells a story.
Gather Your Project Essentials
A successful DIY project starts with having everything you need on hand. There’s nothing worse than having to stop midway to find a tool. Here’s your checklist: * **Your Brass Cookware:** An old *handi*, *kadhai*, *lota*, or any other brass vessel. * **Cleaning Supplies:** For a natural clean, you’ll need lemons/vinegar and salt. For a high-shine finish, a commercial brass polish (like Brasso) and a soft cloth. * **Safety Gear:** Safety goggles and gloves are essential, especially for drilling. * **Drill & Drill Bit:** An electric drill with a cobalt or titanium-coated drill bit designed for metal. * **Potting Essentials:** A plastic liner (like a nursery pot that fits inside), a layer of small pebbles or gravel, good quality potting mix, and of course, your chosen plant.
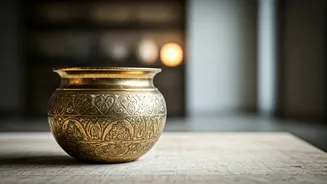
Step 1: Clean and Restore
Your first decision is what kind of finish you want. Do you love the antique, aged look of the patina, or do you prefer a mirror-like shine? For a gentle clean that preserves the patina, simply wash the vessel with soap and water and dry it thoroughly. To restore its original lustre, you have two options. The traditional, natural method is to make a paste of lemon juice and salt (or vinegar and salt), rub it all over the brass, let it sit for a few minutes, and then scrub gently with a soft brush before rinsing and drying. For a faster, more dramatic result, apply a commercial brass polish according to the product's instructions, buffing it to a brilliant shine with a clean, dry cloth.
Step 2: Drill for Drainage
This is the most critical step for your plant’s health. Without drainage, water will pool at the bottom of the pot, causing root rot. Place your brass vessel upside down on a stable, non-slip surface like a wooden block. Put on your safety goggles. Mark one or more spots for your drainage holes at the centre of the base. Using your metal-specific drill bit, apply firm, steady pressure and drill through the brass. Start slow to create a guide point, then increase the speed. Let the drill do the work; don’t force it. Once done, turn the pot over and clear away any metal shavings.
Step 3: Line for Longevity
While you can plant directly into the brass, it’s not the best idea for the long term. Constant moisture can accelerate tarnishing on the inside, and over time, the copper in the brass alloy can leach into the soil, which isn’t ideal for some sensitive plants. The simple, professional solution is to use a liner. Find a thin plastic nursery pot that fits snugly inside your brass vessel. If it’s too tall, simply trim the rim with scissors until it sits just below the edge of the brass pot, making it invisible. This liner protects your plant’s roots and your precious heirloom.
Step 4: Potting Your Plant
Now for the fun part! First, place a thin layer of small pebbles at the bottom of your plastic liner to further improve drainage. Fill the liner about two-thirds full with a good quality potting mix suitable for your chosen plant. Gently remove your plant from its original container, loosen the root ball slightly, and place it in the centre of the pot. Fill the surrounding space with more soil, pressing down lightly to remove air pockets. Water the plant thoroughly, allowing excess water to drain out completely before placing the liner inside your beautiful new brass planter.
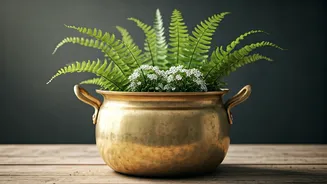
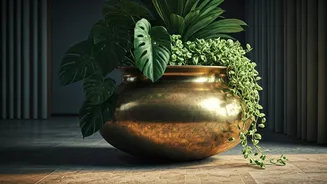
Choosing Plants and Styling
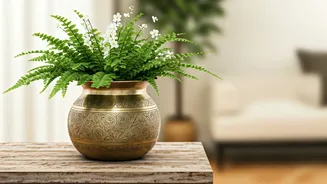
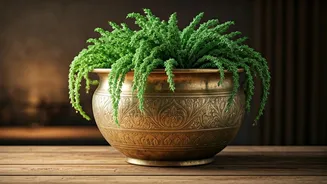
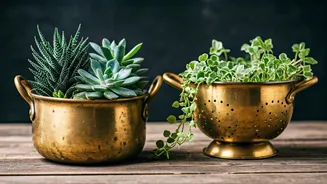
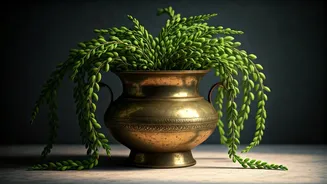
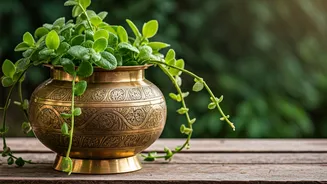
The best plants for brass planters are those that complement its classic look. Hardy, low-maintenance options are a great start. Succulents and cacti look fantastic, as their sculptural shapes contrast beautifully with the warm metal. Trailing plants like Golden Pothos or English Ivy will spill elegantly over the sides. Upright plants like the Snake Plant or ZZ Plant add a touch of modern structure. Place your new creation on a bookshelf, a coffee table, or a sunny windowsill where it can be admired. Your upcycled planter is more than just a pot; it’s a conversation starter.