


The Viral Sensation Explained
So, what exactly is this magical dessert? At its core, it's a no-churn ice cream, meaning you don’t need any special equipment like an ice cream maker. The simple but brilliant formula consists of just two key components: full-fat cream and sweetened
condensed milk. When whipped and combined correctly, these two ingredients create a luxuriously smooth and rich ice cream base that freezes perfectly without forming unwanted ice crystals. The simplicity is its genius. There's no complicated custard to cook, no eggs to temper, and no special machinery required, making it accessible to absolutely anyone with a bowl and a whisk or electric beater.
Why Is It So Popular in India?
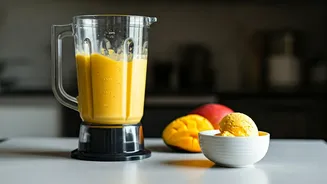
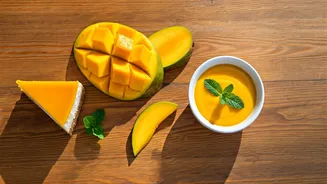
The trend has exploded across Indian social media for several reasons. First is the sheer ease of preparation. In a country where summers are long and hot, the ability to whip up a batch of homemade ice cream in minutes is a massive draw. The ingredients are also readily available in most local kirana stores. Another significant factor is its incredible versatility. The two-ingredient base is like a blank canvas, perfect for incorporating classic Indian flavours. Home cooks and food bloggers have been adding everything from mango puree and cardamom to saffron (kesar) and rosewater, creating endless desi-style variations. The visual appeal of these customised creations, often garnished with chopped pistachios and almonds, makes for highly shareable content on platforms like Instagram and YouTube.
The Foolproof 2-Ingredient Recipe
Ready to try it yourself? Here’s the basic recipe that has taken the internet by storm. You will need approximately 500 ml of full-fat whipping cream (chilled) and one 400g can of sweetened condensed milk (also chilled). Start by pouring the cold whipping cream into a large, chilled bowl. Using an electric mixer or a whisk, beat the cream until it forms stiff peaks. This means that when you lift the beaters, the cream holds its shape firmly. Be careful not to over-whip, or you’ll start making butter! In a separate bowl, pour out the sweetened condensed milk. Then, gently fold about a cup of the whipped cream into the condensed milk to lighten it. Once combined, fold the lightened milk mixture back into the remaining whipped cream until just incorporated. The key is to be gentle to keep the air in the cream. Pour the mixture into a freezer-safe container, cover, and freeze for at least 6-8 hours, or overnight.
Level Up with Indian Flavours
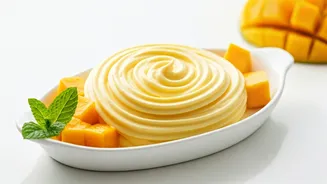
This is where the fun really begins. The neutral, sweet base is perfect for customisation. For a classic Mango Ice Cream, gently fold in about half a cup of thick mango puree into the base mixture before freezing. To create a Kesar Pista flavour, soak a pinch of saffron strands in a tablespoon of warm milk and add it to the base, along with a handful of chopped pistachios. For a Rose or Paan flavour, a few drops of rose essence or paan essence can transform the dessert entirely. Another viral trend involves Rusk Ice Cream, where milk-soaked rusk, nuts, and cardamom are blended to create a base with a texture similar to traditional kulfi. You can also add crushed Oreo biscuits for a crowd-pleasing cookies-and-cream version.
Tips for Perfect, Creamy Results
To ensure your ice cream is perfectly smooth and creamy, a few small details make a big difference. First, make sure both your cream and condensed milk are thoroughly chilled before you begin. It also helps to chill the bowl and beaters you plan to use for at least 30 minutes in the freezer. Using full-fat cream is non-negotiable; low-fat versions won't whip up properly and will result in an icy texture. When folding the whipped cream and condensed milk together, use a light hand to maintain as much air as possible. This aeration is what keeps the ice cream soft and scoopable. Finally, for best results, press a piece of plastic wrap or parchment paper directly onto the surface of the ice cream before putting the lid on the container. This helps prevent ice crystals from forming on top.