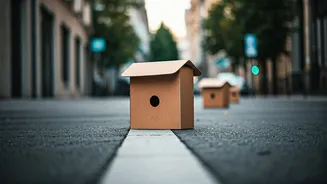


Why a Simple Shelter Matters
The monsoon brings much-needed relief from the heat, but for India’s stray cat population, it presents a significant threat. Constant wetness can lead to hypothermia, skin infections, and a weakened immune system, making them vulnerable to diseases. Kittens
are especially at risk. Unlike dogs, many cats will not seek shelter in crowded or open spaces, preferring small, enclosed areas where they feel safe. By providing a dry, protected space, you offer them a crucial sanctuary to rest, stay warm, and survive the relentless rains. A simple cardboard box, when properly prepared, can be the difference between life and death for a community cat.
Gather Your Simple Materials
You don’t need to be a DIY expert to build an effective cat shelter. Most of the materials are likely already in your home or can be acquired for free. You will need: * **A sturdy cardboard box:** A medium-sized box from a grocery store or an online delivery is perfect. It should be large enough for a cat to turn around in but small enough to retain body heat. * **Waterproofing material:** Thick plastic garbage bags, a small tarpaulin sheet, or plastic sheeting works best. * **Strong tape:** Wide packing tape or duct tape is essential for sealing all seams. * **A box cutter or sharp scissors:** For creating the entrance. * **Insulating bedding (optional but recommended):** Straw is the best option as it repels moisture. Avoid blankets, towels, or newspaper, as they absorb water and can make the shelter cold and damp.
Step 1: Waterproof Your Box
An untreated cardboard box will turn into a soggy mess within minutes of a downpour. Waterproofing is the most critical step. Start by taping all the box's seams and flaps shut with your packing tape. Then, wrap the entire box, top to bottom, with your plastic sheeting or garbage bags, like you’re wrapping a gift. Overlap the plastic generously to ensure there are no gaps where water can seep in. Use plenty of tape to secure the plastic tightly around the box, paying special attention to the corners and the bottom. The goal is to create an impenetrable barrier against rain.
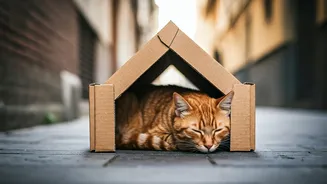
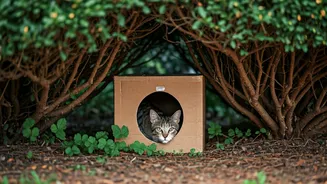
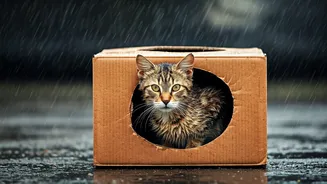
Step 2: Cut a Safe Entrance
The entrance needs to be just right. Using your box cutter, carefully cut a doorway that is about 15 cm by 15 cm (6x6 inches). This is big enough for a cat but small enough to deter larger animals like stray dogs and to keep the interior protected from wind and rain. Place the entrance a few inches above the ground to prevent rainwater from flowing inside. It’s also a good idea to cut the door on one of the longer sides of the box, and slightly off-centre, rather than right in the middle. This creates a protected corner inside where the cat can curl up away from drafts.
Step 3: Insulate for Warmth
Once your shelter is waterproofed and has an entrance, it’s time to make it cosy. The best bedding for an outdoor shelter is straw (the dry, hollow stalks of cereal grains, not hay, which can mould). Loosely pack a generous layer of straw inside. The cat will burrow into it to stay warm. Straw works because it allows moisture to settle at the bottom while the top layer remains dry. If you use blankets or hay, they will absorb moisture from the cat’s paws and the humid air, becoming a cold, wet trap that can actually lower the cat's body temperature.
Smart Placement and Maintenance
Where you place the shelter is as important as how you build it. Find a discreet, quiet location away from heavy foot and vehicle traffic. Good spots include a corner of your building’s compound, under an awning, in a covered parking area, or tucked away in a garden. If possible, elevate the shelter slightly off the ground on a few bricks to prevent water from pooling underneath. To avoid conflict, it’s a good practice to inform your neighbours or Resident Welfare Association (RWA) about your compassionate project. Place bowls of fresh water and food near the shelter, but not inside, to prevent spills that would soil the bedding and attract ants or other pests.