






The Science of Vibrant Color
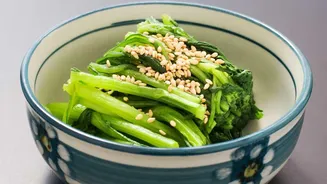
The magic of blanching lies in its ability to halt the very enzymes that degrade vegetables. When you harvest green vegetables, enzymes like chlorophyllase immediately start to break down chlorophyll, the pigment that gives them their vibrant green color.
This process continues even when vegetables are stored, leading to a dull, olive-brown appearance. A quick dip in boiling water, however, is hot enough to denature and permanently inactivate these enzymes. The heat also causes trapped gases in the plant's tissues to escape, which makes the green color appear even more intense and uniform. By stopping the enzymes in their tracks, blanching effectively locks in that bright, fresh-from-the-garden color.
Preserving the Perfect Crunch
Texture is just as important as color, and blanching is key to maintaining that satisfying snap. The same enzymes responsible for color loss also cause vegetables to become soft and mushy over time as they break down the plant's cell structure. While the initial heat of blanching does cause some slight softening of the vegetable's cell walls, it's a controlled process. By deactivating the enzymes, it prevents the much more significant mushiness that would otherwise develop during storage, especially in the freezer. This is why unblanched frozen vegetables often thaw into a disappointingly limp and disintegrated state, while properly blanched ones retain a pleasant, crisp-tender bite.
The All-Important Ice Bath
Blanching is a two-part process, and the second step is as critical as the first: the ice bath. Immediately after their brief time in boiling water, vegetables must be 'shocked' by plunging them into a bowl of ice water. This rapid cooling instantly stops the cooking process. If you skip this step, the residual heat will continue to cook the vegetables, leading to over-blanching. Over-blanching results in a soft texture and a loss of flavor, color, and valuable nutrients, defeating the entire purpose of the technique. The ice bath ensures that the vegetables remain perfectly crisp-tender and their color stays locked in.
How to Blanch Vegetables at Home
Ready to try it yourself? The process is simple. First, prepare your vegetables by washing and cutting them into uniform pieces. Next, bring a large pot of generously salted water to a rolling boil—a good rule of thumb is about one gallon of water for every pound of vegetables. While the water heats, prepare a large bowl of ice water. Working in batches to avoid dropping the water temperature too much, add your vegetables to the boiling water. The blanching time depends on the vegetable, but it's typically short: asparagus and green beans need about 2-3 minutes, while leafy greens like spinach may only need 30 seconds. As soon as the time is up, use a slotted spoon or strainer to quickly transfer the vegetables from the boiling water directly into the ice bath. Let them cool completely, then drain and dry.
More Than Just Good Looks
While preserving color and texture are the headline benefits, blanching offers other advantages. The process cleans the surface of vegetables, helping to remove dirt and microorganisms. It can also reduce the bitterness found in some vegetables, like kale or broccoli rabe. Most importantly for home cooks, blanching is an essential step before freezing produce. By halting enzyme activity, it preserves the flavor, texture, and nutritional quality of vegetables for months in the freezer, preventing the development of off-flavors and freezer burn. It's the key to enjoying your garden's bounty all year long.