





Humidity: The Unseen Enemy in Your Pantry
In a humid climate, the air itself becomes a threat to dry goods. Pulses like lentils, beans, and chickpeas are hygroscopic, meaning they absorb moisture from their surroundings. When the moisture content in these grains rises, it creates the perfect
breeding ground for mould and fungi, which can produce harmful mycotoxins. This excess moisture also leads to clumping, loss of nutritional value, and an accelerated spoilage process. Furthermore, damp conditions encourage the hatching of insect eggs, leading to infestations of common pantry pests like weevils and flour beetles, which contaminate food and cause significant waste.
The Science of an Air-Tight Seal
The solution is simpler than you think: creating a physical barrier between your food and the moist air. An air-tight container, particularly one made of glass, is the most effective way to do this. Glass is a non-porous material, meaning it has no tiny holes for moisture or pests to seep through. A quality air-tight lid with a rubber gasket or a tight-fitting screw-on mechanism prevents the exchange of air, locking moisture out and keeping the contents dry. This barrier not only stops spoilage from humidity but also cuts off the oxygen supply that insects need to survive and reproduce, effectively preventing infestations from starting or spreading.
Choosing the Right Jar for the Job
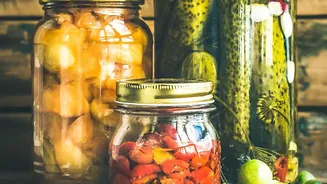
While any air-tight container is better than none, glass jars are the superior choice for several reasons. Unlike plastic, glass is inert and doesn't leach chemicals into your food, ensuring its purity and taste remain unchanged. It’s also resistant to stains and odours, so your turmeric-stained plastic woes will be a thing of the past. When choosing your jars, look for ones with a strong, reliable sealing mechanism. The transparency of glass also allows you to easily see your stock levels and check for any early signs of spoilage without opening the container. They are also endlessly reusable and easy to clean, making them a sustainable and cost-effective choice in the long run.
A Step-by-Step Guide to Perfect Pulse Storage
Properly storing your pulses is a simple process that pays huge dividends. First, ensure your pulses are completely dry before storing; if you've just bought them, consider spreading them on a tray for a few hours. Always use clean, dry jars. Before storing, some households practice freezing the pulses in a sealed bag for 48 hours to kill any potential insect eggs that may have been present from the point of purchase. After this, transfer the pulses into your air-tight glass jars, filling them up to leave minimal air at the top. For added protection against residual moisture, you can place a small muslin pouch of salt or a few dried bay leaves inside, traditional methods known to repel pests and absorb dampness. Finally, store your jars in a cool, dark, and dry place away from direct sunlight and heat sources like your stove.
Know the Warning Signs of Spoilage
Even with the best storage methods, it's wise to periodically check your supplies. Inspect your pulses for clumping, which indicates moisture has gotten in. Any musty, sour, or 'off' smells are a clear sign that the pulses have spoiled and should be discarded. Visually, look for any discolouration, mould (which can appear as fuzzy spots), or the presence of live or dead insects, larvae, or fine, web-like material, which indicates a pest infestation. If you spot any of these signs, it's safest to throw away the entire contents of the jar to avoid any health risks. Then, thoroughly wash and dry the jar before refilling it.