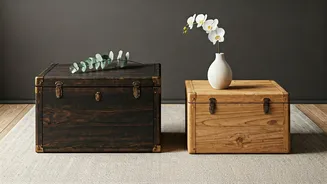


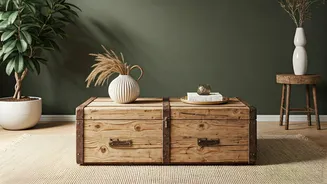
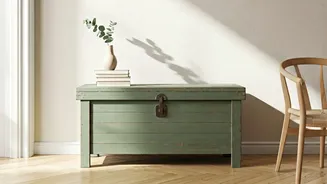


Embrace the Japandi Spirit
Before you pick up a sander, let's understand what makes a design 'Japandi'. It’s a beautiful hybrid of Japanese minimalism and Scandinavian functionality. The aesthetic celebrates natural materials, muted colour palettes, clean lines, and an appreciation
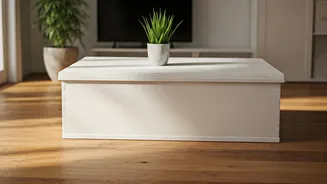
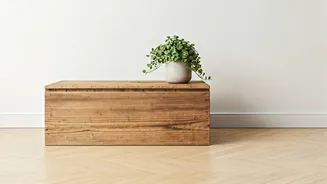
for craftsmanship and imperfection (known as 'wabi-sabi'). For our project, this means we aren’t trying to make the vintage box look brand new. Instead, we’ll enhance its natural texture, celebrate its history, and give it a new, functional purpose. Think light wood tones, matte blacks, and a focus on the raw beauty of the timber itself. The goal is a piece that feels calm, grounded, and intentionally simple.
Gathering Your Supplies
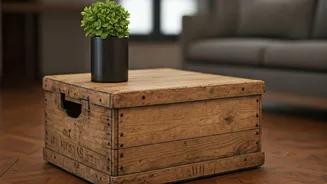
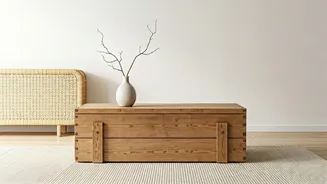
Sourcing the right materials is half the fun. You'll need a sturdy vintage wooden box—anything from an old trunk to a simple crate will work, as long as the wood is solid. Look for interesting grain patterns or dovetail joints. Flea markets, antique shops, and even online marketplaces are great places to search. Here’s your checklist: - **The Box:** A solid vintage wooden box of your desired size. - **Legs:** Four table legs. You can find hairpin legs, simple tapered wooden legs, or even block-style legs online or at hardware stores. - **Tools:** An electric sander or sandpaper (medium and fine grit), screwdrivers, a drill, and clean cloths. - **Finishes:** Wood cleaner, wood stain or matte paint (in a Japandi-friendly colour like light oak, walnut, or matte black), and a clear matte or satin polyurethane sealer. - **Hardware:** Screws for attaching the legs.
Step 1: The Prep Work
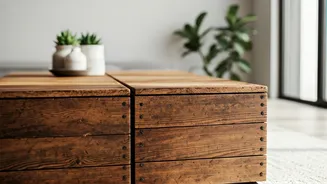
A great finish starts with proper preparation. First, give your box a thorough cleaning. Use a mild wood cleaner and a damp cloth to wipe away decades of dust and grime, both inside and out. Let it dry completely. Now, it’s time to sand. The goal is not to erase all character but to create a smooth surface for the new finish. Start with a medium-grit sandpaper (around 120-grit) to smooth out any rough patches and remove old, flaking varnish. Follow up with a fine-grit sandpaper (around 220-grit) for a silky-smooth feel. Always sand in the direction of the wood grain. Once you’re done, wipe away all the sanding dust with a clean, dry cloth. This step is crucial for an even, professional-looking result.
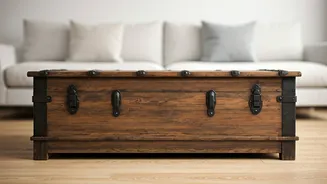
Step 2: Staining and Sealing
This is where the Japandi aesthetic truly comes to life. If you want to highlight the natural wood, choose a light stain like a whitewash, light oak, or a natural teak finish. Apply the stain evenly with a cloth or brush, following the product’s instructions. Let it penetrate the wood, then wipe away the excess. For a more dramatic, modern Japandi look, consider a matte black or charcoal paint. Apply two thin coats for a solid, even colour. Whatever you choose, the key is a non-glossy finish. Once your stain or paint is completely dry, it's time to protect your work. Apply two coats of a clear matte or satin polyurethane sealer. This will protect the table from spills and wear without adding an undesirable shine, preserving that organic, natural feel.
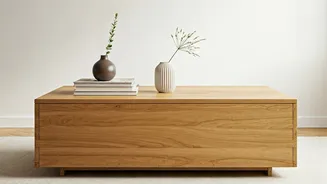
Step 3: Adding Legs and Finishing
Turning your box into a table is the final, transformative step. Flip the box upside down on a soft surface to avoid scratching your new finish. Position your four legs, one at each corner. Measure carefully to ensure they are equidistant from the edges for a balanced look. Use a pencil to mark where the screws will go. If the wood is hard, it’s a good idea to drill small pilot holes first to prevent the wood from splitting. Then, securely screw the legs into place. Flip your new coffee table upright and admire your handiwork. The box's storage—whether it has a hinged lid or an open top—is now a clever, hidden feature of your new table, perfect for stashing remote controls, magazines, or blankets.