



Understanding Your Shell Planter
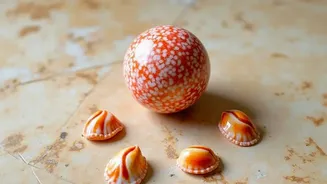
Shell planters, often crafted from iridescent capiz, sturdy coconut, or mosaic arrangements of various shells, are prized for their natural beauty. Unlike standard terracotta or plastic pots, their composition is organic and often more delicate. These
materials are porous and can be susceptible to changes in temperature and moisture, making them prone to specific issues. Capiz shells, for instance, are the semi-transparent outer shells of a marine mollusk and are naturally fragile. Understanding that these planters are not just vessels but decorative pieces made from natural elements is the first step in providing the right care. Their unique construction means they interact with water, soil, and sunlight differently than man-made materials, necessitating a more mindful approach to maintenance.
The Weekly Crack Inspection
A quick weekly check is your best defence against serious damage. Run your fingers gently along the surface and around the edges of the planter, feeling for any hairline fractures or chips. Visually inspect the planter in good light, paying close attention to the base and rim, where stress is most common. Small, cosmetic cracks might not seem like a big deal, but they can compromise the planter's integrity over time. These tiny fissures can allow water to seep into the material, weakening it from the inside out and potentially leading to larger breaks. For plants, these cracks can also create sharp edges that may damage delicate root systems as they grow. Catching a crack early means an easier, more effective repair.
How to Repair Minor Cracks
If you find a small crack, addressing it promptly can prevent it from worsening. For many shell planters, especially those with a mosaic or resin-coated finish, a clear, non-yellowing waterproof epoxy or a strong bonding adhesive is an effective solution. First, ensure the planter is completely clean and dry. Carefully apply a small amount of the adhesive directly into the crack, using a fine tool like a toothpick to ensure it penetrates fully. Wipe away any excess from the surface with a clean cloth before it sets. Allow the repair to cure completely according to the manufacturer’s instructions—this can take 24 hours or more. This simple fix restores the planter's structural integrity and seals it against moisture, protecting both the planter and the plant within.
Tackling Mould and Mildew
Mould thrives in damp, dark conditions with poor air circulation—a perfect storm that can occur in any plant pot. Overwatering, compacted soil, and lack of drainage are the primary culprits. On a shell planter, mould can appear as fuzzy white or black spots on the soil's surface or even on the exterior of the pot itself. To treat it, start by improving the conditions. You can gently scrape the visible mould off the soil. For cleaning the planter's surface, a mild solution of one part white vinegar to four parts water is often effective. Apply the solution with a soft cloth, gently wiping the affected areas. Avoid using harsh chemical cleaners, which can damage the delicate shell surface. After cleaning, ensure the planter dries completely.
A Proactive Prevention Strategy
Prevention is always better than cure. To keep both cracks and mould at bay, adopt a few simple habits. First, ensure proper drainage. If your shell planter doesn't have a drainage hole, it's best to use it as a decorative outer pot, placing your plant in a smaller plastic pot with drainage inside it. This prevents water from sitting directly against the shell material. Water your plants wisely; allow the top inch or two of soil to dry out between waterings to avoid creating a constantly damp environment. Position your planter where it gets good air circulation and the appropriate amount of sunlight for the plant, as sunlight is a natural mould inhibitor. Finally, periodically wiping the planter with a dry, soft cloth removes dust and organic debris that can trap moisture and encourage mould growth.