

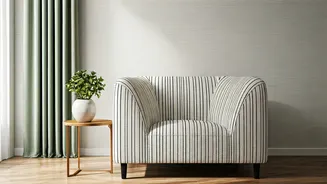


Why Linen Texture Works Wonders
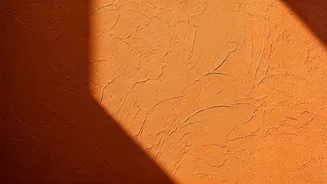
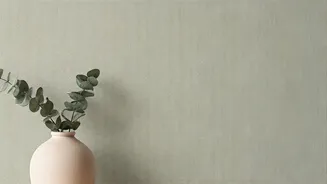
The magic of this hack lies in the texture. Linen-look wallpaper brings an immediate sense of warmth, depth, and sophistication to a room. Unlike flat, single-colour paint, the subtle woven pattern catches light beautifully, making a space feel cosier
and more thoughtfully designed. It’s the secret ingredient for creating that calm, curated, and 'aesthetic' vibe that’s popular in modern Indian homes. While real linen wall coverings are expensive and difficult to install, a high-quality peel-and-stick version gives you the same visual effect for a fraction of the cost and effort. It’s the perfect solution for renters or anyone hesitant to commit to a permanent design choice.
Choosing Your Perfect Wallpaper
Not all peel-and-stick wallpapers are created equal. For this hack to succeed, quality is key. Start by ordering samples from a few different brands. This allows you to see the true colour in your room’s lighting and, more importantly, feel the texture and thickness. Look for a vinyl material that feels durable and has a convincing fabric-like finish. Cheaper, thinner papers can tear easily and may look plasticky. When you’ve found 'the one,' measure your wall’s height and width carefully. The golden rule of wallpapering is to order about 10-15% more than you need. This extra amount will cover any mistakes, allow for pattern matching, and give you a small reserve for future repairs.
Prep Your Space for Success
The secret to a professional-looking finish is all in the preparation. A smooth, clean surface is non-negotiable. Start by wiping down the entire wall with a mild cleaning solution and a damp cloth to remove any dust, grime, or oil. Let it dry completely. Next, run your hand over the surface. If you feel any bumps, nail holes, or imperfections, fill them with a small amount of spackle, let it dry, and then sand it smooth. Even tiny bumps can show through the wallpaper and create air bubbles. While many peel-and-stick products claim to work on textured walls, they perform best on a smooth surface. Taking an hour for prep work will save you hours of frustration during application.
The Step-by-Step Application Guide
With your wall prepped, it’s time for the fun part. Start at one corner of the wall. Measure the height of your wall and cut your first panel of wallpaper, leaving about two extra inches at both the top and bottom for trimming. Peel back only the first 6-8 inches of the paper’s backing. Align the top edge with the ceiling, leaving that extra bit of overhang. Once you’re happy with the placement, press it firmly onto the wall. Now, working your way down, slowly pull off the backing with one hand while using a plastic smoother or a credit card with your other hand to smooth the paper onto the wall. Work from the centre outwards to push any air bubbles toward the edges. Don’t peel the entire backing off at once—this is the most common mistake and leads to the paper sticking to itself.
Mastering Seams and Corners
For your second panel, slightly overlap it with the first by a few millimetres. This tiny overlap is crucial for preventing a gap from appearing between the panels if the wallpaper shrinks over time. Use the pattern of the linen texture to help you camouflage the seam. Smooth the second panel down just as you did the first. When you reach a corner, let the paper run past the corner by about an inch. Make a vertical cut in the overhang at the corner, then smooth the paper onto both walls. Use a sharp craft knife and a straight edge (like a ruler) to trim the excess paper at the ceiling, baseboard, and along the corner for a crisp, clean line. The same technique applies for cutting around light switches and plug points: cover them, then carefully cut away the excess.