






The Heart of the Glow: Crafting Your Clay Diyas
There’s a special charm in decorations made by hand. Creating your own clay diyas is a simple, rewarding activity that brings a personal touch to your festive decor. You'll need air-drying clay, which is readily available and doesn't require a kiln. Start
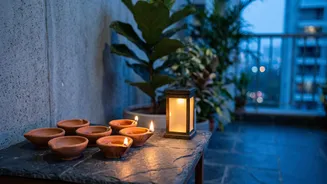
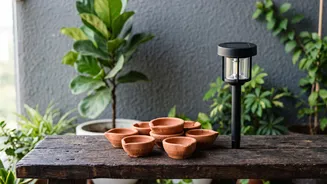
by taking a small, palm-sized portion of clay and rolling it into a smooth ball. Press your thumb into the center to create a hollowed-out pinch pot shape, which will hold the tealight or traditional oil and wick. You can keep the design simple and rustic or add details by gently pinching one side to form a spout or carving patterns along the edges with a toothpick. Let the diyas dry for 24-48 hours until they are completely hard. Once dry, you can paint them with acrylics, add glitter, or decorate them with small mirrors and beads for an extra festive sparkle. Using battery-operated tealights is a safe alternative to open flames, especially for balconies.
Sustainable Sparkle: Choosing Solar String Lights
Solar-powered string lights are a game-changer for outdoor decorating. They eliminate the need for messy wiring and outdoor power sockets, making them a safe and eco-friendly choice. These lights charge during the day using a small solar panel and automatically switch on at dusk, casting a warm, inviting glow. When choosing lights, consider the colour temperature; warm white or golden lights tend to create a cozier ambiance than stark, cool white ones. Many solar string lights also come with multiple modes, such as steady, twinkling, or slow-fading, allowing you to customize the atmosphere. Look for options with a good waterproof rating (like IP44 or higher) to ensure they can withstand rain or dust. They come in various designs, from classic fairy lights and globe bulbs to festive shapes like stars or flowers.
Designing Your Cozy Corner
With your diyas and lights ready, it's time to style your balcony. Start by hanging the solar string lights. Drape them along the railings for a classic look, or create a canopy effect by crisscrossing them overhead for a magical, tent-like feel. You can also wrap them around potted plants or any balcony furniture to integrate light into every corner. Next, arrange your handmade diyas. Cluster them in groups on a small table, place them along the floor against a wall, or line them up on a wide windowsill. Creating varying levels of light adds depth and interest. For a traditional touch, you can place diyas in an urli bowl filled with water and flower petals.
Layering with Textiles and Greenery
To truly achieve a 'cozy' atmosphere, texture is key. Introduce soft textiles to your balcony. Lay down an outdoor rug to define the space and add warmth underfoot. Toss a few comfortable cushions and a throw blanket on a chair or a floor mattress to create an inviting spot to relax and enjoy the festive evening. Plants and flowers are another essential element. Potted plants add life and a natural softness to the decor. You can hang planters from the ceiling or place them in corners. For a festive scent and vibrant colour, add garlands of marigolds, which can be draped along the railings or hung as a toran at the balcony entrance.
Final Touches and Essential Safety
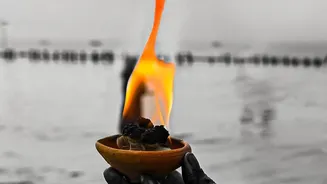
Your festive balcony is almost complete. Now for the final details and, most importantly, safety. If you choose to use traditional oil diyas instead of battery-operated ones, exercise extreme caution. Place them on stable, non-flammable surfaces, far away from curtains, cushions, paper decorations, or any other flammable materials. Never leave an open flame unattended, and be sure to extinguish all diyas completely before you go to bed or leave the house. It's also wise to keep a bucket of water or sand nearby as a precaution. For clothing, it is recommended to wear cotton and avoid synthetic fabrics like nylon, which can catch fire easily. With these safety measures in place, you can relax and soak in the beautiful, warm glow of your personally styled festive haven.