






Get Your Hair Ready
Before you start braiding, a little preparation goes a long way. For the best results, work with hair that isn't freshly washed. Second-day hair often has more grip and texture, which helps the braid hold its shape. If your hair is too clean and silky,
it can be difficult to manage. A quick spritz of dry shampoo or a texturizing spray can add the grit you need. Brush your hair thoroughly to remove any knots and tangles, ensuring a smooth braiding process. If you're aiming for a fuller, more voluminous braid, you can tease the hair slightly at the crown before you begin.
The Effortless Fishtail Braid
The fishtail braid looks intricate and impressive, but it’s surprisingly simple once you get the rhythm. It’s perfect for a casual day out or a relaxed evening. Start by pulling all your hair to one side and splitting it into two equal sections. Take a small piece of hair from the outside of the left section, cross it over the top, and join it with the right section. Then, take a small piece from the outside of the right section, cross it over, and add it to the left section. Repeat this pattern all the way down. The key is to keep the pieces you're crossing over small and consistent. Secure the end with an elastic. Don't worry if it looks a little messy; that’s part of its charm.
The Romantic Dutch Braid
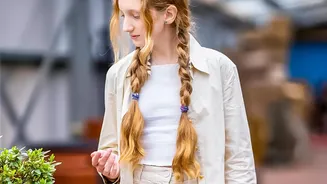
Often called a 'reverse French braid', the Dutch braid creates a beautiful, raised plait that sits on top of the hair. To create one, start with a section of hair at your hairline and divide it into three strands. Instead of crossing the side strands over the middle one as you would in a French braid, you cross them under. Cross the right strand under the middle, then cross the left strand under the middle. As you continue down, add a small amount of new hair to each strand before you cross it under. Continue this until you reach the nape of your neck, then finish with a regular three-strand braid. This style is incredibly versatile and can be done as a single braid down the back or as two pigtail braids.
The Quick and Quirky Rope Braid
When you're short on time but still want a stylish look, the rope braid is your best friend. It uses only two strands and is often easier to master than a traditional three-strand braid. Start by taking a section of hair and splitting it into two equal pieces. Twist both sections in the same direction—for example, twist them both towards your face. Then, cross the two twisted sections over each other in the opposite direction. If you twisted them forward, you'll cross them backward. The opposing tension is what locks the braid in place. You can do this as a simple ponytail or incorporate it into a French-style braid by adding new hair to each section before you cross them over.
The Finishing Touch: Pancaking
The secret to achieving that coveted loose, full, and 'undone' look is a technique called pancaking. Once your braid is secured with an elastic, gently pull on the outer edges of each loop, starting from the top and working your way down. This flattens and widens the braid, giving the illusion of much thicker hair. Be careful not to pull too hard, or the braid might come apart. The goal is to loosen it just enough to create volume and a softer, more relaxed appearance. This simple step can transform any tight, neat braid into a beautifully messy masterpiece.