





More Than Just a Stretch
Surya Namaskar is a comprehensive practice that integrates physical movement, controlled breathing, and mindful awareness. Traditionally performed in the morning to greet the sun, this sequence is celebrated for being a complete workout in itself. When
practiced dynamically, it elevates the heart rate, providing a cardiovascular workout, while the postures work to stretch and strengthen all the major muscle groups in the body. From your back and shoulders to your legs and core, the flow engages your entire system, making it an efficient way to improve flexibility, build strength, and promote balance.
Step 1: Pranamasana (Prayer Pose)
Begin by standing at the front of your mat with your feet together. Bring your palms together in a prayer position at your chest. Stand straight and relax your shoulders. This initial pose helps to centre the mind and body, establishing a sense of calm and focus before you begin the sequence.
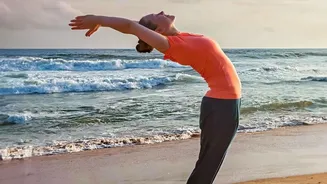
Step 2: Hastauttanasana (Raised Arms Pose)
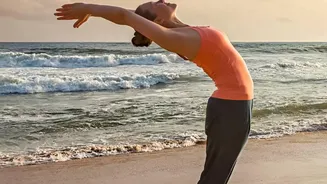
Inhaling, lift your arms up and back, keeping your biceps close to your ears. Gently arch your back from the waist, pushing your hips slightly forward. This posture stretches the entire front of the body, opens the chest, and helps to improve lung capacity.
Step 3: Hastapadasana (Standing Forward Bend)
Exhaling, bend forward from the hips, keeping your spine straight. Bring your hands down to the floor beside your feet. This forward bend stretches the hamstrings and spine, and it can help improve digestion and reduce fat in the abdominal region.
Step 4: Ashwa Sanchalanasana (Equestrian Pose)
Inhaling, push your right leg back as far as possible and bring the right knee to the floor. Look up, lifting your chin. The left foot remains between your palms. This pose tones the abdominal muscles, strengthens the legs, and improves concentration.
Step 5: Dandasana (Stick Pose)
As you breathe in, take your left leg back and bring your whole body into a straight line, like a plank. Your arms should be perpendicular to the floor. This pose is excellent for building arm, shoulder, and core strength.
Step 6: Ashtanga Namaskara (Salute with Eight Points)
Gently bring your knees down to the floor and then exhale. Rest your chest and chin on the floor, keeping your hips slightly raised. This results in eight parts of the body touching the floor: two hands, two feet, two knees, the chest, and the chin.
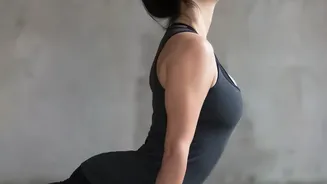
Step 7: Bhujangasana (Cobra Pose)
Slide forward and raise your chest up into the Cobra Pose as you inhale. Keep your elbows bent and shoulders away from your ears. This pose strengthens the back muscles, increases spinal flexibility, and can help alleviate stress.
Step 8: Adho Mukha Svanasana (Downward-Facing Dog)
Breathing out, lift your hips and tailbone up to form an inverted 'V' shape. This pose strengthens the arms and legs, improves circulation, and provides a deep stretch for the entire back of the body.
Step 9: Ashwa Sanchalanasana (Equestrian Pose)
Inhaling, bring your right foot forward between your hands. The left knee comes down to the floor. Look up. This is a repeat of Step 4, continuing to open the hips and tone the leg muscles.
Step 10: Hastapadasana (Standing Forward Bend)
Exhaling, bring your left foot forward next to the right. Straighten your legs and bend from the waist, as in Step 3. This continues to stretch the hamstrings and spine.
Step 11: Hastauttanasana (Raised Arms Pose)
Inhaling, roll your spine up, raise your hands, and bend backward slightly, repeating the motion from Step 2. This helps to lengthen the spine and open the chest.
Step 12: Pranamasana (Prayer Pose)
As you exhale, first straighten the body, then bring your arms down and return to the prayer position. This final pose brings you back to a state of calm and completes the cycle.