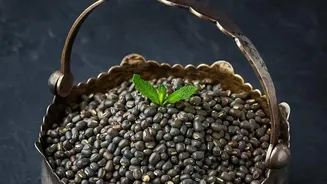







The perfect urad dal vada is a thing of beauty: a deep golden, doughnut-shaped fritter with a shatteringly crisp exterior that gives way to a cloud-like, fluffy interior. Often seen as a special-occasion treat, we're demystifying the process.
The Foundation: Perfecting the Dal
The journey
to a perfect vada begins long before the frying pan. The crucial first step is soaking the urad dal (skinned black gram). It’s recommended to use whole, unpolished urad dal for the best texture. A common mistake is not soaking the dal long enough; a minimum of two to four hours is essential, though some cooks swear by soaking it overnight. This step ensures the lentils soften adequately, which is vital for achieving a smooth, fluffy batter. After soaking, drain the dal completely in a colander. Any excess water will make the batter runny and lead to oily vadas that don't hold their shape.
The Heart of the Vada: Grinding the Batter
This is where the magic happens, and it's also the step that intimidates most home cooks. The goal is to create a thick, smooth, and aerated paste with as little water as possible. Traditionally, a stone grinder is used, which naturally aerates the batter. However, a modern mixer grinder or blender works well if you are careful. Add the drained dal to the grinder and start grinding without any water first. Then, add chilled water, one tablespoon at a time, only as needed to keep the blades moving. The final batter should be thick, like a soft dough, not a flowing liquid. A critical test for consistency is the 'float test': drop a small dollop of batter into a bowl of water. If it floats, your batter is light and perfectly aerated. If it sinks, you need to whisk it more vigorously to incorporate air.
Building Flavour and Texture
Once your batter has passed the float test, it’s time to add the aromatics that give medu vada its signature savoury taste. Finely chopped green chillies, ginger, curry leaves, and whole or crushed black peppercorns are classic additions. For a restaurant-style vada, you can add finely chopped onions and even small pieces of fresh coconut. One important tip is to add salt and onions just before you are ready to fry. Adding them too early will cause the onions to release water, thinning out your carefully prepared batter. Some recipes also suggest adding a teaspoon or two of rice flour or fine semolina (rava) to the batter. This not only helps to thicken a slightly runny batter but also guarantees an extra crispy finish.
The Art of Shaping and Frying
The iconic doughnut shape can be tricky, but it's achievable with practice. The key is to keep your hands wet to prevent the sticky batter from clinging to your palms. Take a lemon-sized portion of batter in your wet palm, flatten it slightly, and use your thumb or index finger to poke a hole in the center. Then, gently slide the vada off your fingertips into the hot oil. For beginners who find this difficult, shaping the batter on a piece of wet banana leaf or parchment paper and then transferring it to the oil is a great alternative.
Fry the vadas in moderately hot oil on a medium flame. If the oil is too hot, the vadas will brown quickly on the outside but remain raw inside. If it’s not hot enough, they will absorb too much oil and become greasy. Fry only a few vadas at a time to avoid overcrowding the pan and lowering the oil temperature. Flip them gently and cook until they are an even golden brown and crisp on both sides.
Troubleshooting Common Vada Problems
Even with careful preparation, things can sometimes go wrong. If your vadas turn out hard, it's likely the dal was understoked or the batter wasn't aerated enough. If they are too oily, the batter was probably too thin, or the oil temperature was too low. Adding a little rice flour can fix a runny batter. If your vadas are bursting in the oil, it's often due to excess water in the batter. Don't be discouraged by initial failures. Mastering the medu vada is a process of understanding the batter and the heat, and every attempt is a step closer to perfection.