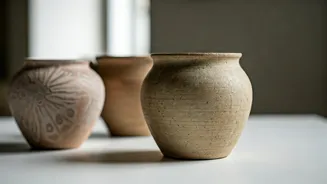


Finding the Right Chest
The hunt is half the fun. Look for old trunks, sandooks, or storage chests at flea markets, antique shops, or even online marketplaces. The ideal candidate is made of solid wood, not particleboard. Check for structural integrity—a little surface wear
is fine, but avoid pieces with severe rot, woodworm damage, or a wobbly frame that can’t be easily fixed. Don't be deterred by a scratched finish or dated hardware; that’s all part of the transformation. Ensure the size is right for your living room. A good rule of thumb is that the coffee table should be no more than two-thirds of your sofa's length and roughly the same height as your sofa cushions.
Gathering Your Supplies
Before you begin, assemble your toolkit. Having everything ready will make the process smoother. You'll need: sandpaper (in coarse, medium, and fine grits), wood cleaner, tack cloths or microfiber rags, wood filler, a putty knife, painter's tape, and your choice of finish—be it wood stain, paint, or a clear varnish. For safety, grab some dust masks, safety goggles, and gloves. Optional but helpful items include an electric sander, which will save you a lot of time and effort on larger surfaces, and new hardware or legs if you plan on updating them.
The Crucial Prep Work
This is the most important step for a professional-looking finish. Start by giving the chest a thorough cleaning with a wood-safe cleaner to remove years of grime and dust. Once dry, it’s time to sand. If you're removing an old, thick varnish, start with a coarse-grit sandpaper (around 80-grit) and work your way up to a medium (120-grit) and then a fine grit (220-grit) for a smooth finish. Always sand in the direction of the wood grain. If the chest is in good condition and you just want to paint it, a light scuff-sanding is often enough to help the new paint adhere. Wipe away all dust with a tack cloth before moving on.
Repair and Reinforce
Now is the time to address any imperfections. Use wood filler to patch up any deep scratches, gouges, or old hardware holes you don't plan to reuse. Apply it with a putty knife, slightly overfilling the area as the filler will shrink a bit as it dries. Once fully cured, sand the filled spots flush with the surrounding wood. Check all joints and corners for stability. If anything feels loose, apply some wood glue and use clamps to hold it securely in place until the glue dries. This ensures your coffee table will be sturdy enough for daily use.
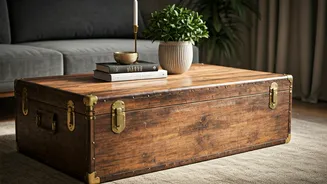
The Creative Finish: Paint or Stain
This is where your vision comes to life. If you love the natural wood grain you uncovered during sanding, enhance it with a wood stain. Apply the stain with a rag or brush, let it penetrate for the time recommended by the manufacturer, and then wipe off the excess. For a more modern or colourful look, opt for paint. A good quality primer is essential, especially if you're painting a light colour over dark wood. Apply two thin coats of your chosen paint, letting it dry completely between coats. For a distressed, vintage look, you can lightly sand the edges and corners after painting to reveal the wood underneath.
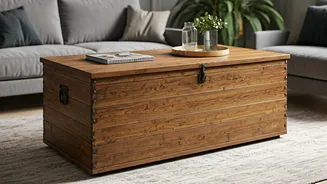
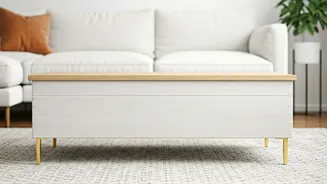
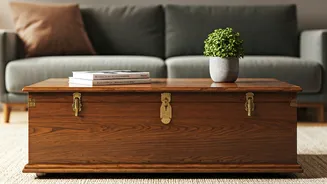
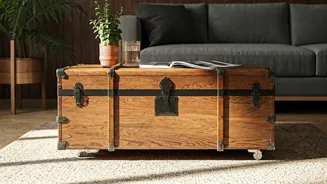
Adding Legs and Hardware
To elevate your chest from a floor piece to a functional coffee table, you'll need to add some height. You can buy ready-made furniture legs in a variety of styles—from sleek hairpin legs for a mid-century modern vibe to classic turned wooden legs. Attach them securely to a reinforced base at the bottom of the chest. If the original hardware (hinges, latches, handles) is beautiful, simply clean and polish it. If it's dated or damaged, replace it with new hardware that complements your chosen style. This small detail can have a huge impact on the final look, turning a simple chest into a 'premium' piece.
Seal and Protect Your Work
The final step is to protect your newly refinished piece. A coffee table top needs to be durable enough to withstand spills, hot mugs, and daily wear. Apply at least two to three coats of a clear protective topcoat like polyurethane or a hard wax oil. Choose a finish that matches your desired sheen—matte, satin, or gloss. Apply thin, even coats, lightly sanding with very fine-grit sandpaper (400-grit) between each coat for an ultra-smooth, durable surface. Let it cure completely before use, which can take several days depending on the product and humidity.