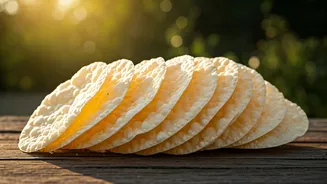


The Magic of a No-Waste Kitchen
In the heart of every Indian kitchen lies a philosophy of resourcefulness. Nothing goes to waste, especially not a staple like rice. Chawal ke papad, also known as rice sandige or biyyam vadiyalu, are the perfect embodiment of this principle. They are a timeless
snack born from the simple act of transforming something humble into something spectacular. It’s more than just a recipe; it's a connection to summers spent on the terrace, watching sheets of these delicate discs dry under the sun. Making them yourself is not only economical and sustainable but also brings a piece of that cherished tradition right into your home.
Gathering Your Simple Ingredients
The beauty of this recipe is its simplicity. You don’t need a long list of fancy items, just a few kitchen staples. The star of the show is, of course, the leftover rice.
Here’s what you’ll need:
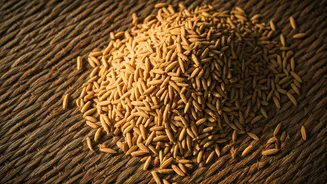
- 1 cup of cooked, leftover rice (any plain white rice works well)
- 2 to 2.5 cups of water
- Salt to taste (about ½ to ¾ teaspoon)
- ½ teaspoon cumin seeds (jeera)
- ½ teaspoon chilli flakes (optional, for a bit of heat)
- A pinch of asafoetida (hing) (optional, for flavour)
You will also need a large, thick-bottomed pan for cooking, a blender, and a clean plastic sheet or greased steel plates for drying.
Step 1: Creating the Perfect Batter
The first step is to turn your leftover rice into a smooth, pourable batter. Add the cooked rice and one cup of water to a blender. Grind it until you have a completely smooth, fine paste with no rice grains visible. This might take a few minutes, so be patient and scrape down the sides of the blender as needed. Once smooth, pour this rice paste into your thick-bottomed pan. Add the remaining water, salt, cumin seeds, chilli flakes, and hing (if using). Whisk everything together thoroughly until the batter is uniform and lump-free. The consistency should be like a thin dosa batter—not too thick, not too watery.
Step 2: Cooking the Batter to Thickness
This is the most crucial stage. Place the pan on the stove over medium-low heat. Begin to stir the batter continuously. It is essential to keep stirring to prevent the batter from sticking to the bottom of the pan and forming lumps. As it heats up, you will notice the batter starting to thicken. Continue stirring for about 8-10 minutes. The batter is ready when it becomes thick, glossy, and translucent. A good way to check is to dip a spoon in; the batter should coat the back of the spoon evenly. It will have a consistency similar to a thick porridge or glue. Once it reaches this stage, turn off the heat and let it cool for 5-10 minutes. It will thicken slightly more as it cools.
Step 3: Shaping and Sun-Drying
Now for the part that requires a little sunshine and patience. Lay a large, clean plastic sheet in an area that gets direct, strong sunlight, like a balcony or terrace. You can lightly grease the sheet to be extra safe, but it's often not necessary. Take a spoonful of the warm batter and drop it onto the sheet, using the back of the spoon to spread it into a thin, small circle. Don't make them too thick, or they won't dry properly, and don't make them paper-thin, or they will break. Leave some space between each papad. Repeat until all the batter is used up. Let the papads dry in the sun for 1-2 days. The timing depends on the intensity of the sun. They are ready when they are completely dry, brittle, and peel off the plastic sheet easily. If they feel even slightly soft, they need more time.
Storing and Frying to Crispy Perfection
Once your papads are bone-dry, you can store them in an airtight container for several months, ready for an instant snack. To enjoy them, heat some oil in a kadai or deep pan for deep-frying. The oil should be hot but not smoking. To test, drop a small piece of papad into the oil; it should sizzle and puff up immediately. Carefully slide a few papads into the hot oil. They will expand and turn white and crispy in just a few seconds. Use a slotted spoon to remove them quickly before they brown, and place them on a paper towel to absorb any excess oil. Serve them immediately as a side with your meal or as a standalone crunchy snack with your evening tea.