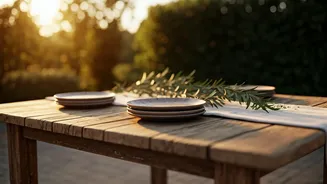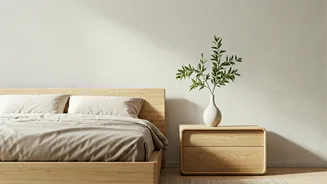


Understanding the Japandi Vibe
Before you start sanding, let's talk about why this project works so well. Japandi is a hybrid of Japanese minimalism and Scandinavian warmth. It’s built on principles like ‘wabi-sabi’ (finding beauty in imperfection) and ‘hygge’ (a sense of cosiness
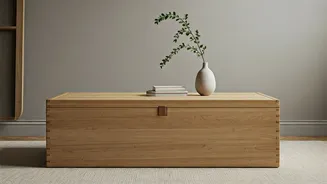
and contentment). The style favours natural materials, neutral colour palettes, clean lines, and uncluttered spaces. A vintage wooden trunk, with its history, texture, and solid form, is a perfect candidate for a Japandi centrepiece. You’re not just making a table; you’re creating a functional piece of art that tells a story.
Sourcing Your Vintage Trunk
The hunt is part of the fun. Look for trunks at flea markets, antique shops, or online marketplaces. Don't be deterred by a few scratches or a faded finish—that’s character! What’s important is a solid structure. Check for wood rot, significant water damage, or pests. Ensure the size is appropriate for your living space; it should be proportional to your sofa. A flat top is ideal for a coffee table, so avoid trunks with highly domed lids unless you're prepared for a more complex levelling project. Pine, cedar, or oak are common materials and all work beautifully when refinished.
Essential Tools and Materials
Gathering your supplies first makes the process smoother. You will likely need: * **Cleaning:** Mild soap, water, cloths, and a soft brush. * **Preparation:** Sandpaper (medium and fine grit), a sanding block or orbital sander, and tack cloths. * **Safety:** Dust mask, gloves, and safety glasses. * **Finishing:** A wood stain or matte/satin paint in a neutral colour, a natural bristle brush or foam applicator, and a clear matte polyurethane or wax-based sealant. * **Hardware:** 4 table legs (metal hairpin, simple wooden dowel, or block style), mounting plates, and screws. * **Tools:** A drill and screwdriver.
The Prep Work: Clean and Sand
This is the most crucial step for a professional-looking finish. First, give the trunk a thorough cleaning inside and out. A solution of mild soap and water is usually sufficient. Let it dry completely. Next, it’s time to sand. If the trunk has an old, flaky varnish, you may need to start with a medium-grit sandpaper (around 120-grit) to remove it. Always sand in the direction of the wood grain. The goal is not to erase every dent and ding—remember, wabi-sabi—but to create a smooth, even surface that will accept the new finish. Follow up with a fine-grit sandpaper (220-grit) for a silky-smooth feel. Once you’re done, wipe away all the dust with a tack cloth. Work in a well-ventilated area, and always wear your dust mask.
Applying the Japandi Finish
For a true Japandi look, stick to natural and muted tones. A light, warm wood stain can enhance the natural grain. Alternatively, a matte black, charcoal grey, or creamy white paint can provide a modern, minimalist contrast. Apply your chosen finish in thin, even coats, allowing adequate drying time between each. If staining, wipe away excess stain after a few minutes to achieve the desired shade. Once you’re happy with the colour, seal the entire piece with two or three coats of a matte or satin polyurethane. A matte finish is key to avoiding a high-gloss look that can feel out of place in a Japandi scheme. This protective coat will make the surface durable enough for daily use.
Adding Legs for Elevation
Turning your trunk from a storage box into a coffee table requires one final transformation: adding legs. This not only raises it to a comfortable height (typically 16-18 inches total) but also gives it a lighter, more modern silhouette. Simple black metal hairpin legs are a popular and stylish choice. Alternatively, short, tapered wooden legs or simple block feet can also work beautifully. Position the mounting plates evenly on the underside of the trunk, typically a few inches in from each corner for stability. Pre-drill pilot holes to prevent the wood from splitting, then securely screw the plates and legs into place.