



Meet Your SCOBY
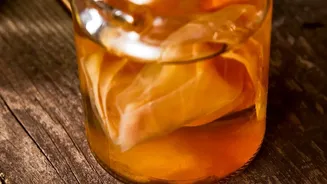
The magic of kombucha starts with a SCOBY, an acronym for Symbiotic Culture Of Bacteria and Yeast. It looks like a rubbery, pancake-shaped disc and is often called the 'mother' because it can be used to start new batches. This living culture is the engine
of fermentation; its bacteria and yeast work together to transform sweetened tea into the tangy, slightly effervescent drink you know and love. The SCOBY consumes the sugar, creating beneficial organic acids and probiotics in the process. You can get a SCOBY from a friend who brews, a local health food store, or an online supplier. For your first batch, it's often easiest to buy a fresh one that comes packed in some starter liquid.
Gather Your Equipment and Ingredients
You don’t need a science lab to brew kombucha, just a few key items. For a standard one-gallon batch, you will need: a large glass jar (at least 4 litres), a tightly woven cloth cover (like a clean tea towel or several layers of cheesecloth), and a rubber band to secure it. For ingredients, you’ll need filtered water, plain white cane sugar, black or green tea (about 8 tea bags or 2-3 tablespoons of loose leaf), and your SCOBY along with at least one cup of strong starter tea (which is just unflavoured kombucha from a previous batch). It's crucial to use plain tea without oils, like Earl Grey, as added flavours can harm the SCOBY. Also, avoid using metal containers or utensils, as the acidity of the brew can react with them.
Step 1: The First Fermentation (F1)
This is where your sweet tea becomes kombucha. First, bring about four cups of filtered water to a boil, remove from heat, add your sugar, and stir until it's completely dissolved. Then, steep your tea for 10-15 minutes. Once steeped, remove the tea bags or leaves and add the remaining cool, filtered water to your large glass jar. It is very important to let the sweet tea cool down completely to room temperature (between 20-29°C). If the tea is too hot, it will kill the delicate cultures in your SCOBY. Once cooled, gently place your SCOBY into the jar and pour in the starter liquid. Cover the jar with your cloth and secure it with a rubber band. Place the jar in a warm spot away from direct sunlight and let it ferment for 7 to 14 days. The longer it ferments, the more sour and less sweet it will become. You can start tasting it after a week to see if it has reached a flavour you enjoy.
Step 2: The Second Fermentation (F2) for Fizz
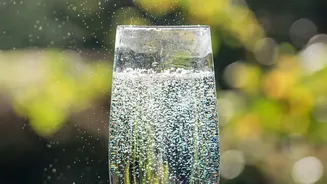
If you want your kombucha to be fizzy and flavoured, you'll need a second, anaerobic (oxygen-free) fermentation. This step traps the carbon dioxide that the yeast naturally produces, creating carbonation. First, carefully remove the SCOBY from your brew, along with about two cups of the kombucha, and set it aside for your next batch. Now you can add your flavourings directly to the remaining kombucha. Fresh fruit, fruit juice, herbs, and spices like ginger are popular choices. Pour the flavoured kombucha into airtight, pressure-safe bottles, like flip-top glass bottles, leaving an inch or two of headspace at the top. Seal the bottles and let them sit at room temperature for another 2 to 5 days. The added sugar from the fruit will feed the yeast, creating those lovely bubbles.
Popular Flavour Combinations
The beauty of homemade kombucha is the endless flavour possibilities. For your second fermentation, you can get creative. A little goes a long way, and you can add chopped fruit, purees, or juices directly into your bottles. Some simple and delicious combinations to get you started include: Ginger and Lemon, Pineapple and Mint, Strawberry and Basil, Blueberry and Cinnamon, and Passionfruit. Non-citrus juices like cranberry, grape, or pomegranate also work very well and can create a vibrant colour. For extra fizz, use pureed fruit or juice, as the yeast can access the sugars more easily.
Essential Safety and Storage Tips
Cleanliness is critical for safe brewing. Always wash your hands thoroughly and ensure all your equipment is well-cleaned to prevent contamination from unwanted microbes. During fermentation, keep an eye out for mould, which can appear as fuzzy black, green, or white spots on your SCOBY. If you see any mould, you must discard the entire batch, including the SCOBY, and start over. During the second fermentation, pressure builds inside the bottles. To avoid explosions, it's wise to 'burp' your bottles once a day by briefly opening the cap to release excess pressure. Once your kombucha has reached the desired level of fizz, move the bottles to the refrigerator. Chilling will slow the fermentation process to a near halt and is essential before opening to prevent a gushing mess. Properly refrigerated, your finished kombucha will last for several weeks.