





Understanding the Magic of Lacto-Fermentation
The process we're using is called lacto-fermentation, and it's the magic behind foods like real sauerkraut, kimchi, and traditional dill pickles. It doesn't involve oil or vinegar. Instead, it relies on salt, water, and the natural bacteria present on vegetables.
The salt creates a brine that inhibits the growth of harmful bacteria while allowing beneficial Lactobacillus bacteria to thrive. These good bacteria convert the sugars in the vegetables into lactic acid, which acts as a natural preservative, gives the pickles their characteristic sour tang, and creates a food rich in probiotics.
Essential Gear for Your Pantry Project
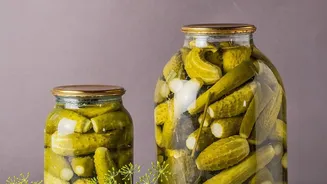
You don't need a massive crock or fancy gadgets to get started. For apartment pickling, minimalism is key. All you truly need is a wide-mouth glass jar (a standard Mason jar is perfect), salt, and water. To ensure success, you'll also want a way to keep the vegetables submerged under the brine. You can buy special glass fermentation weights, but a smaller jar that fits inside the larger one, or even a clean stone, will work. Some beginners opt for lids with airlocks, which automatically release fermentation gases, but you can also simply loosen the lid daily to "burp" the jar.
Choosing and Preparing Your Vegetables
Start with fresh, crisp vegetables; the fresher the produce, the better the final pickle. Carrots, green beans, cucumbers, cabbage, and bell peppers are all excellent choices for beginners. Rinse your vegetables well and chop them into your desired shape—spears, rounds, or shreds. For the brine, the two most important rules are to use non-chlorinated water (chlorine can inhibit the good bacteria) and non-iodized salt. Sea salt or kosher salt are ideal choices. A good starting ratio is about 2 to 3 tablespoons of salt per quart of water, creating a brine that should taste pleasantly salty, like seawater.
The Simple Step-by-Step Process
First, pack your chopped vegetables tightly into your clean glass jar. You can add flavourings like garlic cloves, dill sprigs, or peppercorns at this stage. Next, pour your prepared salt brine over the vegetables, leaving about an inch of headspace at the top of the jar. The most critical step is to ensure all vegetables are completely submerged in the brine; any vegetable exposed to air is a potential site for mold. Place your weight on top of the vegetables to hold them down. Loosely screw on the lid or affix your airlock system. Now, place the jar in a corner of your pantry or a cupboard, away from direct sunlight.
Patience and What to Expect
Your job is now mostly to wait and observe. Within a day or two, you should see bubbles appearing in the jar—this is the carbon dioxide produced by the active bacteria and is a great sign! The brine may also turn cloudy, which is a normal part of the process. Depending on the temperature of your apartment, fermentation can take anywhere from three days to two weeks. The best way to check for doneness is to taste it. Once the pickles have reached a flavour and sourness you enjoy, move the jar to the refrigerator. The cold will dramatically slow the fermentation process, preserving your pickles for weeks, or even months.
Troubleshooting Common Concerns
First-time fermenters often have a few worries. If you see a thin, white film on the surface of your brine, it is likely Kahm yeast. It's harmless but can affect the flavour, so you can skim it off. However, if you see fuzzy, colourful patches (blue, green, or black), that is mold, and the entire batch should be discarded. This is almost always caused by vegetables not being fully submerged. Don't be alarmed by sour or funky smells; this is a sign of active fermentation. The finished product should smell pleasantly sour and pickle-like, not rotten or unpleasant.