


The Foundation: A Truly Clean Surface
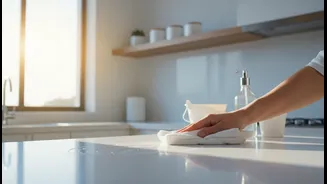
The single most common reason adhesive fixings fail is an improperly prepared surface. Dust, grease, and even the residue from household cleaners can prevent the adhesive from forming a strong bond. Wiping the wall with a wet cloth isn't enough; many
cleaners leave behind a slippery film. For the best results, you must use isopropyl rubbing alcohol. Pour some on a clean, lint-free cloth and wipe the area where you plan to place the fixing. Let it air dry completely. This simple step removes invisible oils and grime, giving the adhesive a perfectly clean slate to grip onto. If you’ve painted recently, wait at least seven days for the paint to fully cure before cleaning and applying any adhesive strips.
Compatibility is Key
Not all surfaces are created equal in the world of adhesives. Removable fixings thrive on smooth, non-porous surfaces. Think painted drywall (not freshly painted), sealed wood, glass, metal, and smooth tiles. These surfaces allow the adhesive to make full contact and create a powerful bond. Conversely, certain surfaces are almost guaranteed to cause failure. Avoid textured or rough walls, as the uneven surface creates air gaps that weaken the grip. Wallpaper is another no-go, as the fixing can tear the paper upon application or removal. Porous surfaces like unpainted brick, concrete, or raw plaster also pose problems, as they can absorb moisture and break down the adhesive over time. Before you buy, check the product packaging to confirm it's suitable for your intended surface.
Choose Your Fixing Wisely
Using the wrong type of fixing for the job is another path to disappointment. Manufacturers offer a wide range of products designed for specific purposes. Check the weight rating on the package and ensure it can handle the item you plan to hang. It's always better to use a fixing rated for a slightly heavier weight than you need. A small hook rated for 500g will not hold a three-kilogram framed print for long. There are also specialised strips for different environments. If you’re hanging something in a bathroom or kitchen, use a product specifically designed for high humidity and moisture resistance, as standard strips can soften and fail in these conditions.
The Art of Application and Patience
Once you’ve cleaned the surface and chosen the right hook, the application process itself is crucial. After attaching the adhesive strip to the hook, press the entire hook firmly against the wall for at least 30 seconds. This ensures the pressure-sensitive adhesive makes full contact. But the most skipped step is also the most important: waiting. Most adhesive strips require an hour to cure and build a strong bond with the surface. Hanging anything on the hook before this time is up dramatically increases the chance of failure. The adhesive needs time to flow into the microscopic pores of the surface and set properly. For picture-hanging strips, this involves an extra step of removing the frame after the initial application, pressing the strips on the wall again, and waiting an hour before reattaching the frame. Follow the package instructions to the letter.
Damage-Free Removal
When it's time for a change, removing the fixing correctly is just as important as applying it. Never pull the hook or the tab towards you, as this is how you peel paint or damage the wall. The trick is to stretch the adhesive tab straight down, parallel to the wall. Hold the hook gently in place with one hand and slowly pull the tab downwards with the other. The tab will stretch—often to a surprising length—before the hook releases cleanly from the wall. If the pull-tab breaks, don't panic. Gently warm the plastic base with a hairdryer for about 30 seconds to soften the adhesive. Then, you can often use a piece of dental floss to saw through the softened adhesive behind the hook, separating it from the wall without damage.