






That beautiful surplus from your garden or farmers' market haul deserves better than slowly wilting in the fridge. Freezing is a fantastic way to preserve peak-season produce, but doing it right is key to locking in nutrients and flavor.
The Non-Negotiable First Step: Blanching
The secret to
freezing vegetables that don't turn into a mushy, discolored mess is a process called blanching. This involves scalding vegetables in boiling water or steam for a short time and then immediately plunging them into an ice bath to stop the cooking process. It might seem like an extra step, but it's essential. Blanching deactivates natural enzymes in the vegetables that would otherwise continue to degrade their color, texture, flavor, and nutritional content, even in the freezer. While a small amount of water-soluble vitamins, like C and B vitamins, can be lost during the quick boil, this initial loss is minimal compared to the significant nutrient degradation that occurs in unblanched vegetables over months of storage.
Step 1: Prep Your Produce
Start by thoroughly washing your vegetables under cold water to remove any dirt or residue. Once clean, peel, trim, and cut them into uniform pieces. This not only prepares them for future recipes but also ensures they blanch and freeze evenly. For broccoli and cauliflower, break them into florets. For green beans, snap off the ends. For carrots, peel and slice or dice them. The goal is to have them ready to use straight from the freezer when you need them.
Step 2: The Blanch and Shock
Bring a large pot of water to a rolling boil, using at least one gallon of water per pound of vegetables to ensure the temperature doesn't drop significantly when you add the produce. Add your prepared vegetables to the pot. The blanching time starts once the water returns to a boil. Most vegetables require between two to five minutes. For example, green beans, broccoli florets, and sliced zucchini typically need three minutes, while peas need only about 90 seconds. As soon as the timer goes off, use a slotted spoon to rapidly transfer the vegetables from the boiling water into a large bowl filled with ice water. Let them cool in the ice bath for the same amount of time they were blanched. This 'shock' is critical, as it stops the cooking process in its tracks and preserves the vegetable's crisp texture.
Step 3: Dry and Flash Freeze
After the ice bath, drain the vegetables thoroughly and pat them as dry as possible with a clean towel or salad spinner. Excess moisture leads to ice crystals, which can damage the cell structure of the vegetables and cause freezer burn. For best results, 'flash freeze' them before bagging. Spread the dry, blanched vegetables in a single layer on a baking sheet and place it in the freezer for one to two hours, or until they are solid. This step prevents the pieces from clumping together into a solid block, allowing you to grab just the amount you need later on.
Step 4: Pack for the Long Haul
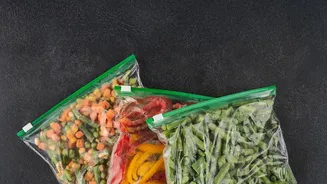
Once flash-frozen, transfer the vegetables into airtight containers or heavy-duty freezer bags. Removing as much air as possible is crucial for preventing freezer burn. If using bags, press out all the air before sealing. A vacuum sealer is an excellent tool for this and provides the best protection. Label and date your containers clearly. Properly blanched and stored vegetables can maintain their quality and nutritional value for 8 to 12 months in a freezer set at 0°F or lower.
The Exceptions to the Rule
Not all vegetables require blanching. Vegetables with a lower enzymatic load or different cellular structure can be frozen raw with good results. Bell peppers, onions, and tomatoes (best for sauces) can be chopped and frozen directly. On the other hand, vegetables with very high water content, such as lettuce, cucumbers, and radishes, do not freeze well at all and will turn limp and watery upon thawing. It's best to enjoy those fresh.