






Why the Braided Bun Wins Mornings
The braided bun is the ultimate solution for a polished look without the fuss. It keeps your hair neatly off your face, making it perfect for a long day at work, a workout, or running errands. The braid adds an element of texture and sophistication that
elevates it beyond a simple knot, making it look like you spent far more time on it than you actually did. Plus, the structure of the braid provides a better grip for bobby pins, meaning your style is more secure and less likely to slip during the day. It's a style that works wonders on second-day hair, as the natural oils can provide extra hold and texture.
Get Ready: What You’ll Need
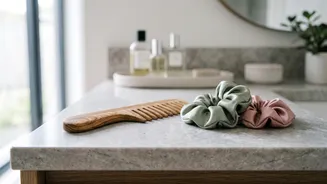
Before you begin, gather a few basic tools to make the process smooth and efficient. You won't need much, which is part of the appeal. Have these items handy: a hairbrush or comb, one strong hair tie for the ponytail, a small clear elastic for the end of the braid, and a handful of bobby pins that match your hair colour. For extra hold and to tame flyaways, you might also want a flexible-hold hairspray or a texturizing spray, especially if your hair is freshly washed and slippery.
Step 1: Create a Secure Ponytail
The foundation of a long-lasting braided bun is a well-placed ponytail. Start by brushing your hair to remove any knots. Decide where you want your bun to sit—a high ponytail at the crown creates a classic ballerina look, while a low ponytail at the nape of the neck offers a more elegant and formal feel. Gather your hair and secure it firmly with a strong hair tie. This initial step is crucial because the ponytail acts as the anchor for the entire style, providing the stability needed to keep it in place all day.
Step 2: Braid the Ponytail
Once your ponytail is secure, it's time to braid. A standard three-strand braid is the simplest and most common choice for this style. Divide your ponytail into three equal sections. Cross the right strand over the middle strand, then cross the left strand over the new middle strand. Continue this pattern all the way down to the ends of your hair. For the best hold, try to keep the braid firm and consistent from top to bottom; a loose plait can cause the bun to unravel later. Secure the end of the braid with a small, clear elastic band.
Step 3: Coil and Pin the Bun
Now for the final step: forming the bun. Take the braid and begin to wrap it around the base of your ponytail, coiling it flat against your head. Keep the coil snug as you go. Once you've wrapped the entire braid, tuck the end underneath the bun to hide the elastic. Secure the bun using bobby pins. For maximum hold, insert the pins in an 'X' pattern, pushing one pin through the edge of the bun into the base and then crossing a second pin over it. Continue pinning around the bun until it feels completely secure.
Variations for Every Hair Type and Style
The beauty of the braided bun lies in its adaptability. If you have thin or fine hair, gently tug on the sides of the braid before you coil it—a technique known as 'pancaking'—to make it appear fuller and create a larger bun. For those with very thick hair, you can split the ponytail into two sections, create two separate braids, and then wrap them around each other to form the bun, which helps distribute the weight. You can also experiment with different types of braids, like a fishtail or a Dutch braid, for a unique texture. For a softer, more romantic look, pull out a few face-framing strands before you start.