

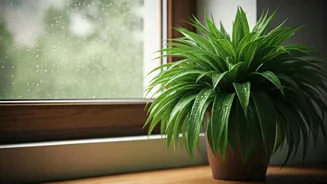


Why the Arrowhead Vine?
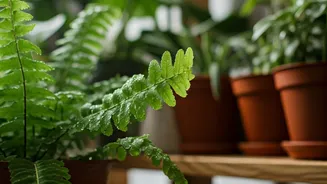
Known scientifically as Syngonium podophyllum, the Arrowhead Vine is the plant world's charming and forgiving friend. Its popularity in Indian homes and offices isn't accidental. First, it’s incredibly resilient. It tolerates lower light conditions found
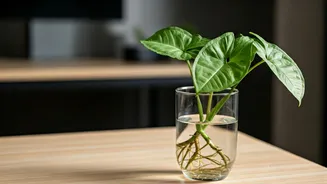
in most indoor spaces and can bounce back if you occasionally forget to water it. Second, it's a visual delight. With leaves shaped like arrowheads that come in shades of green, pink, and cream, it adds a pop of colour and nature to a sterile desk environment. Unlike larger, fussier plants, a single cutting of an Arrowhead Vine looks elegant and minimalist in a simple glass of water, making it ideal for small spaces. It’s the perfect green companion for busy professionals who want the calming benefits of nature without the demanding commitment of a high-maintenance plant.
Propagation: A Fancy Word for Free Plants
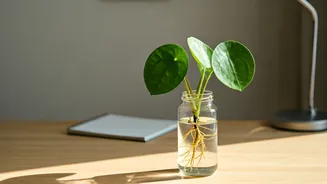
The term ‘propagation’ might sound like something from a botany textbook, but it’s simply the process of creating new plants from an existing one. For the Arrowhead Vine, this is almost laughably easy. You don't need special soil mixes, rooting hormones, or complicated equipment. The most popular method, especially for desk decoration, is water propagation. This involves taking a cutting from a 'mother' plant and placing it in water until it grows its own roots. It’s a fascinating process to watch, as you get a front-row seat to the magic of nature. Within a few weeks, you'll see delicate white roots emerge, turning a simple stem into a self-sustaining new plant. This small, satisfying project offers a welcome screen break and a tangible sense of accomplishment.
Your Step-by-Step Guide to Water Propagation
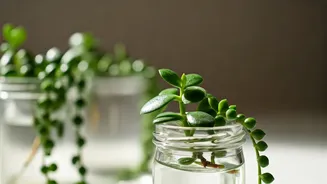
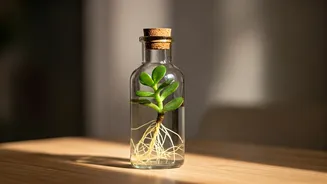
Ready to create your own desk plant? All you need is a healthy Arrowhead Vine, a clean pair of scissors or a knife, and a glass jar or bottle. 1. **Find the Right Stem:** Look for a healthy vine on your mother plant. Follow it down until you find a ‘node’—a small, bumpy nub on the stem where a leaf grows. This node is where new roots will sprout. 2. **Make the Cut:** Using your clean scissors, cut the stem about one inch below a node. Your cutting should ideally have at least two or three leaves on it. 3. **Prepare the Cutting:** Gently remove any leaves on the lower part of the stem, especially any that would sit below the waterline in your jar. This prevents them from rotting and fouling the water. 4. **Place in Water:** Fill your glass jar or bottle with room-temperature water and place the cutting inside. Ensure that at least one node is fully submerged, but the leaves remain above the water. Filtered or bottled water is great, but regular tap water left out for a day to let chlorine evaporate also works well. 5. **Wait and Watch:** Place your jar in a spot with bright, indirect light—near a window but out of the harsh direct sun is perfect. Change the water every 3-5 days to keep it fresh and oxygenated. In about two to four weeks, you’ll see the first roots appear!
Styling Your New Green Accessory
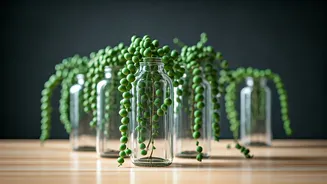
The beauty of this trend lies in its simplicity and customisability. Your choice of container becomes part of the decor. A clear, minimalist glass jar shows off the growing roots, adding a scientific-chic vibe. Old perfume bottles, small glass flasks, or even colourful little jam jars can be repurposed to match your personal style. For a more rustic look, try a small amber glass bottle. You can group a few cuttings together in a larger vessel or have a single, elegant stem on its own. Place it next to your laptop, on a bookshelf, or in any corner that needs a touch of life. It’s a dynamic accessory that changes week by week as the roots grow longer and new leaves unfurl.
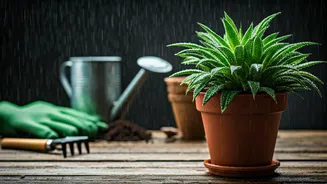
The Next Step: From Water to Soil
While an Arrowhead Vine cutting can live in water for a long time, it will thrive and grow into a much larger plant if transferred to soil. Once the roots on your cutting are at least two to three inches long and have started to develop smaller, secondary roots, it’s ready for its own pot. Choose a small pot with drainage holes and fill it with a standard, well-draining potting mix. Make a small hole in the centre, gently place the rooted cutting inside, and backfill with soil, patting it down lightly. Water it thoroughly and place it back in its bright, indirect light spot. Your simple desk accessory has now graduated into a permanent houseplant, ready to produce more cuttings for you to propagate and share.