




Start With Your Anchor
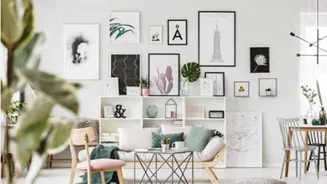
Every great gallery wall begins with a single hero piece. This is your 'anchor,' and it's typically the largest or most visually dominant frame in your collection. It provides a starting point and gives the entire arrangement a sense of gravity, preventing
the wall from feeling like a chaotic jumble of small, competing items. When arranging, place this anchor piece first, often slightly off-centre from the middle of your intended layout. A central placement can feel static, whereas an off-centre anchor creates a more dynamic, natural flow that encourages the eye to travel across the wall. This piece should be substantial enough to ground the collection but not so large that it overpowers everything else. A good rule of thumb is for the anchor to be roughly two to three times the size of your smallest frames.
Build and Bridge with Medium Frames
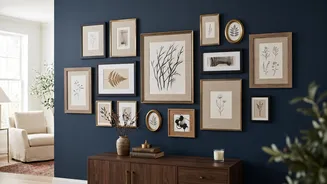
Once your anchor is placed, begin building outward with your medium-sized frames. These pieces act as a bridge, connecting your largest frame to the smaller accents. Arrange them around the anchor, paying attention to both horizontal and vertical orientations to create rhythm and interest. The goal is to distribute the 'visual weight' evenly. Visual weight isn't just about size; a small, dark frame can feel as heavy as a larger, lighter one. Step back frequently to ensure you aren't clustering all the heavy pieces in one corner. For example, if your large anchor frame is on the lower left, balance it by placing a couple of medium frames on the upper right, creating a diagonal equilibrium across the composition.
Fill Gaps with Small Accents
The smallest frames are the last pieces of the puzzle. Use them to fill the remaining gaps and add intricate detail to the overall shape. These are your wildcards—perfect for a quirky postcard, a small sketch, or a beloved sepia-toned photograph. While the large and medium frames create the structure, the small pieces add personality and nuance. This is where you can play with more eclectic shapes or ornate vintage finds. The key is to ensure they don't feel lost. By adding them last, you can strategically place them in spots where they complete a line or balance a larger piece, ensuring the entire wall feels like a single, cohesive unit. Don't be afraid to mix in other small objects like mirrors or sculptural items for added texture.
The Art of Consistent Spacing
Perhaps the most crucial, non-negotiable rule is to maintain consistent spacing between every frame. A gap of 2 to 3 inches is the professional standard. This 'breathing room' is what separates a polished, intentional gallery wall from a cluttered mess. It creates an invisible grid that ties everything together, regardless of the mix of frame styles and sizes. Too little space and the art blurs into one block; too much, and the pieces feel disconnected and float away from each other. An easy trick is to cut a piece of cardboard to your desired width (say, 2.5 inches) and use it as a spacer as you hang each piece. This consistency matters more than having matching frames.
Plan on the Floor First
Before a single nail touches your wall, lay out the entire arrangement on the floor. This allows you to experiment freely, shuffling frames around until the balance feels just right. You can trace each frame onto craft paper, cut them out, and tape the templates to the wall to visualize the final look without making unnecessary holes. This step is vital for seeing how the different sizes interact and for ensuring the overall shape is pleasing to the eye. When you are ready to hang, start with your anchor piece and work your way out, using a photo of your floor layout as a guide.