




Know When It's Time
Before you get your hands dirty, it’s important to know if your plant actually needs a new pot. Repotting at the right time reduces stress on the plant. Most experts agree that late winter or early spring is the ideal time, as plants are entering their
active growth phase. However, if a plant is struggling, don't wait. Look for a few key signs: if roots are growing out of the drainage holes, the plant is top-heavy and tips over easily, or the soil dries out very quickly after watering, it's likely time for an upgrade. Another tell-tale sign is slowed growth; if your plant isn't producing new leaves like it used to, its roots may be too cramped. Gently sliding the plant out of its pot can confirm your suspicions—if you see a dense, tangled mass of roots, the plant is 'root-bound' and needs more space.
Gather Your Supplies
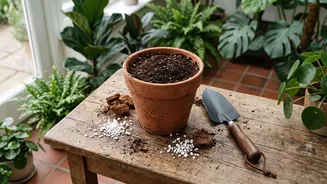
Being prepared makes the process smooth and clean. You don’t need a lot of specialised equipment, just a few key items. First, a new pot. Choose one that is about 1 to 2 inches larger in diameter than the current one for small plants, and 2 to 4 inches for larger ones. Going too big can lead to excess soil retaining too much water, which may cause root rot. Ensure the new pot has drainage holes. Next, you'll need fresh potting mix. It's best to avoid using soil from your garden, which can be too heavy and contain pests. A general-purpose indoor potting mix is suitable for most houseplants. These mixes often contain ingredients like peat moss, perlite, and compost to provide good drainage and nutrients. Finally, have a pair of gloves, some pruning shears or scissors for trimming roots, and a watering can ready.
The Step-by-Step Process
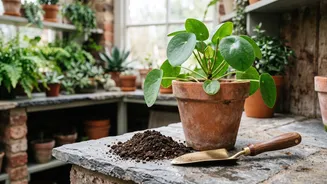
With your supplies ready, it’s time to repot. It's helpful to water your plant a day before you plan to repot it; this can reduce stress and make it easier to remove from its current pot. 1. Remove the Plant: Turn the plant's pot on its side, hold the plant gently by the stems or leaves, and tap the bottom of the container until the plant slides out. 2. Inspect and Loosen the Roots: Gently tease the roots with your fingers to loosen them from the old, compacted soil. If the roots are tightly wound in a circle, don't be afraid to unbind them. You can trim away any that look brown, mushy, or dead with your clean shears. 3. Prepare the New Pot: Add a layer of fresh potting mix to the bottom of the new pot, enough so that the top of the root ball will sit about an inch below the rim of the new pot. 4. Position Your Plant: Place your plant on top of the new soil layer in the center of the pot. Add more potting mix around the sides, gently patting it down to eliminate large air pockets. Ensure the plant is at the same depth it was in its old pot. 5. Water Thoroughly: Once the plant is settled, give it a good watering. This helps the new soil settle around the roots. Allow any excess water to drain out completely.
Post-Repotting Aftercare
Your plant has just been through a significant change, and it needs a little time to recover from what's known as 'transplant shock'. Symptoms can include wilting or yellowing leaves, but with proper care, the plant will bounce back. For the first week or two, keep the plant in a spot with indirect sunlight; direct sun can add extra stress. Avoid fertilizing for at least a month or two, as the fresh soil has plenty of nutrients and you don't want to burn the sensitive, newly disturbed roots. Maintain a consistent watering schedule, but be careful not to overwater. Check the soil moisture and only water when it begins to feel dry. Once you see signs of new growth, you can resume your regular care routine.