

The Magic of Wild Yeast
Unlike breads made with commercial yeast, traditional sourdough relies on a 'starter'—a living culture of flour and water. This mixture captures naturally occurring wild yeasts and beneficial bacteria from the environment. These microorganisms ferment
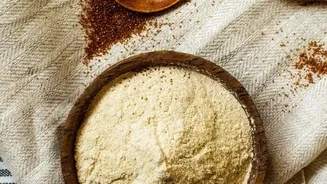
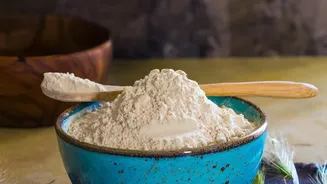
the dough, causing it to rise and giving the final bread its characteristic tangy flavour and chewy texture. Using whole wheat flour (atta) is an excellent way to begin, as the bran and germ of the wheat berry are rich in the very yeasts and microbes you want to cultivate.
What You Will Need
The beauty of a sourdough starter is its simplicity. You don't need any special equipment beyond what's already in your kitchen. Gather these items before you begin: A clean glass jar: A 500-750 ml jar is ideal. It’s important to see the activity, so transparent glass is best. Avoid metal or plastic, which can react with the fermenting culture. Flour: Whole wheat flour (atta) is fantastic for getting a starter going due to its high microbial content. You can also use all-purpose flour (maida), or a blend of both. Water: Use filtered or RO water. Chlorinated tap water can inhibit the growth of the wild yeast, so it's best to avoid it. A kitchen scale: While you can use measuring cups, a scale provides accuracy, which is crucial for maintaining the right hydration and feeding ratio.
Day 1: The Beginning
In your clean glass jar, combine 50 grams of whole wheat flour (atta) and 50 grams of lukewarm water. Mix them thoroughly with a spoon until there are no dry patches of flour left. The consistency should be like a thick paste. Scrape down the sides of the jar, cover it loosely with its lid or a piece of cloth secured with a rubber band, and place it in a warm corner of your kitchen for 24 hours. A loose cover allows gasses to escape while keeping contaminants out.
Days 2-4: The First Feedings
After 24 hours, you may or may not see any activity. This is normal. It's time for the first feeding. Discard about half of the mixture. To the remaining starter, add 50 grams of flour and 50 grams of water. Mix well, cover, and let it sit again. Repeat this process every 24 hours. During these days, you might notice a sour smell, which is a good sign that the right bacteria are starting to work. The warm Indian climate often speeds up this process, so you might see bubbles sooner than you expect.
Days 5-7: Signs of an Active Starter
By now, your starter should be showing clear signs of life. You'll notice plenty of bubbles, and the mixture will start to rise and fall predictably between feedings. The aroma will shift from sharply sour to a more pleasant, yeasty, and slightly tangy smell. A key indicator of readiness is that the starter will double or even triple in volume within 4-8 hours of being fed. In warmer months, you may need to start feeding it twice a day (every 12 hours) to keep it vigorous.
Is It Ready? The Float Test
When you believe your starter is mature and active—reliably doubling in volume and full of bubbles—you can perform a simple test. Drop a small spoonful of the starter into a glass of water. If it floats, it’s filled with carbon dioxide gas and is ready to leaven your first loaf of bread. If it sinks, it likely needs a few more days of consistent feeding to build up its strength.
Maintaining Your Indian Starter
Congratulations, you have a living sourdough starter! If you plan to bake often, you can keep it on your counter and continue feeding it once or twice daily. If you only bake once a week, you can store it in the refrigerator. Just be sure to take it out and feed it at least once a week to keep it alive and healthy. Remember that high heat and humidity can make your starter very active, so you may need to adjust feeding schedules or use slightly less water in the summer to maintain a thicker consistency.