






Choose Your Champion: U-Pins vs. Bobby Pins
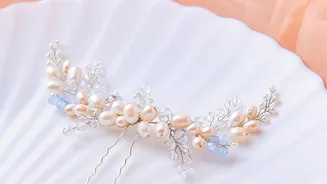
Not all pins are created equal. For a secure low bun, the hero is often the U-pin, also known as a French pin or chignon pin. Unlike bobby pins, which work by clamping small sections of hair, U-pins are designed to anchor the entire structure of the bun to the hair on your
head. Bobby pins are excellent for pinning down flyaways or securing small, flat sections, but they lack the structural integrity to hold a full bun without needing a large quantity, which can cause discomfort. U-pins, especially those with a velvet or textured finish, grip the hair without slipping and can hold a style with just one or two pins. For thick hair, large U-pins or spiral pins provide incredible hold, while those with finer hair might find that smaller, lightweight U-pins are sufficient and more comfortable.
Prepare for Success
The best hairstyles often start with the right foundation. For a bun with staying power, day-old hair is often better than freshly washed, silky strands. The natural oils and texture provide grip that helps the pins hold. If your hair is clean, you can mimic this texture by spritzing a texturizing spray or working a small amount of dry shampoo through the roots and mid-lengths. This simple step gives the hair strands a bit of grit, making them less likely to slip and slide out of your carefully constructed bun. Before you begin, gently brush your hair to remove any tangles, but avoid making it too sleek unless you're aiming for a very polished, severe look.
Create Your Base and Twist
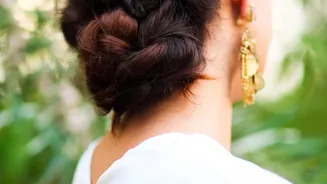
Start by gathering your hair at the nape of your neck into a low ponytail. You can secure it loosely with a hair tie if you have thick or slippery hair, or simply hold it in place if you're comfortable working without one. From here, twist the ponytail from the base to the ends. A tighter twist will result in a sleeker, more compact bun, while a looser twist will create a softer, more voluminous shape. Once your hair is twisted into a rope, begin coiling it around the base of the ponytail, forming the bun shape against your head. Tuck the ends of your hair under the bun as you finish wrapping.
The Art of the Pin
This is where the magic happens. Take your U-pin and hold it with the open end facing away from the bun. The key to a secure hold is a 'scoop and anchor' technique. Start by inserting the tips of the pin into the outer edge of your bun. Push the pin just enough to catch a small amount of hair from the bun, then rotate the pin 180 degrees so the open end is now facing your scalp. Finally, push the pin through the bun, making sure it catches the hair at the base, close to your scalp. This weaving motion locks the bun to your head. You should feel the style become instantly secure. Depending on your hair's thickness, one or two pins used this way are often all you need.
Finishing Touches and Variations
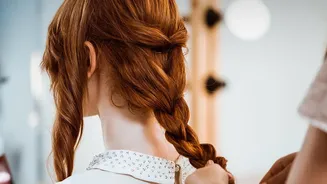
Once your bun is secure, you can personalize it. For a softer, more romantic look, gently pull out a few face-framing strands. You can also gently tug and loosen sections of the bun itself to create more volume and a more 'undone' feel. If you prefer a sleeker finish, use a light-hold hairspray to tame any flyaways. Don't be afraid to experiment with the foundation of your bun. Instead of a simple twist, try braiding your ponytail before coiling it into a bun for added texture and visual interest. This technique is incredibly versatile, allowing you to create a look that's perfect for the office, a casual weekend, or an elegant evening out.