





Gather Your Essential Tools
Before you begin, assembling the right tools will make the process smoother and more professional. You don’t need a full salon kit, but a few key items are non-negotiable for clean sectioning. First, a rat-tail or pintail comb is essential; its slender
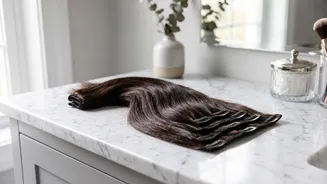
end allows for creating perfectly straight, clean horizontal parts. Next, you'll need several large hair clips or sectioning clips to hold the bulk of your hair securely out of the way while you work. A mirror is crucial, and using a handheld mirror in conjunction with your bathroom mirror will help you see the back of your head clearly. Finally, have your clip-in wefts laid out in order from widest to narrowest, so you can easily grab the correct piece for each section. Starting with clean, dry hair is also recommended, as clips can slide on oily hair.
Create a Secure Base
The foundation of a long-lasting clip-in style is a secure base. This is especially important for those with fine, silky, or freshly washed hair, as the clips need something to grip to prevent sliding throughout the day. For each horizontal section you create, lightly backcomb or tease about an inch of hair at the root where you plan to place the clips. This creates a small cushion of texture for the clips to hold onto. You only need one or two gentle strokes with the comb; the goal isn't to create a large knot, but a subtle texture. For extra hold, you can spritz a small amount of dry shampoo or texturizing spray onto the teased roots before attaching the weft. This simple prep step makes a huge difference in how secure the extensions feel and how well they stay hidden.
Sectioning the Back: Bottom to Top
Always apply clip-ins by working from the bottom of your head upwards. Start by using your pintail comb to create your first clean, horizontal part low on your head, about an inch or two above the nape of your neck. Clip the rest of your hair up and out of the way. This first section is where you’ll typically place a smaller weft, like a 2 or 3-clip piece. After securing the first weft, let down another section of hair about an inch above the first weft. As you move up the back of your head towards the widest part (usually around ear level), you will use your widest wefts, such as the 4-clip pieces. Continue this pattern, releasing a new horizontal section of hair for each weft you apply.
The 'Safe Zone' and Side Pieces
A critical rule for a natural look is to stay within the 'safe zone'. This means you should stop placing wefts about two inches below your crown or your main parting. This top layer of your own hair is what will fall over the extensions and conceal all the clips and seams. Clipping wefts too high is one of the most common mistakes and often results in visible tracks when your hair moves. For the sides of your head, use the smaller 1 or 2-clip wefts. Create a horizontal or slightly diagonal part about two inches above your ear and place a weft here. These side pieces are crucial for framing the face and ensuring the volume and length blend seamlessly from front to back.
Gentle Application and Blending
When snapping the clips in place, be gentle. Attach the clip as close to the root as possible, but avoid pulling it so tight that it causes tension on your scalp. The weft should feel secure but comfortable. Some stylists recommend a 'scooping' motion: push the clip's teeth into the root, slightly scoop upwards to catch the teased hair, and then snap it shut. Once all wefts are in place, the final step is blending. Unclip the top section of your hair and let it fall over the extensions. Use a wide-tooth comb or your fingers to gently mix your natural hair with the extension hair. Styling is the ultimate blending tool. Adding soft waves or curls to your hair and the extensions together is the easiest way to hide any line where your natural hair ends and the extensions begin.