





Why This Style Is a Lifesaver
The half-up, half-down hairstyle is a timeless classic for a reason: it offers the best of both worlds. You get the elegance of wearing your hair down while enjoying the practicality of having it pulled back from your face. The twisted half-updo elevates
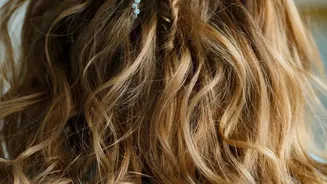
this simple concept, adding a touch of sophistication that looks far more complex than it is. It's incredibly versatile, transitioning seamlessly from a professional work setting to a casual weekend brunch. This style is particularly effective because it works with your hair's natural texture—whether it's straight, wavy, or curly—and can be adapted for various lengths, from bobs to long locks.
What You Will Need
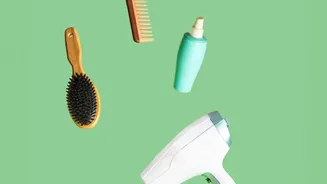
The beauty of this hairstyle lies in its simplicity, and the tools required are just as minimal. You likely already have everything you need on hand. Before you start, gather these items: A brush or comb for sectioning. Two small, clear hair elastics. A few bobby pins that match your hair colour. Optional: A texturizing spray or dry shampoo for grip. Optional: A light-hold hairspray to finish.
The Step-by-Step Twisted Half-Updo
This technique looks intricate, but it is surprisingly simple once you master the basic movement. Follow these steps for a flawless finish in minutes. 1. Prepare Your Hair: This style works best on hair that isn't freshly washed, as the natural oils provide some grip. If your hair is too clean or silky, a light mist of dry shampoo or texturizing spray will help the twists hold their shape. Start with your hair styled as you normally would, whether that's with natural waves or soft curls. 2. Create the First Twist: On one side of your head, take a small section of hair from your temple area. Twist this section upwards and back towards the crown of your head, keeping the twist relatively tight against your scalp. Secure the end with a clear elastic. 3. Cover and Secure: Take a second section of hair from just above your ear on the same side. Bring it up and wrap it over the clear elastic from the first twist, completely covering it. Use a bobby pin to secure this second section underneath the twist, hiding the pin from view. 4. Repeat on the Other Side: Mirror the exact same steps on the opposite side of your head. Create a twist with a section from the temple, secure it with an elastic, and then cover the elastic with a second section of hair from above the ear, pinning it in place. 5. Final Adjustments: Check in the mirror to ensure both sides are symmetrical and sitting at the same height. Gently pull on the edges of the twists to add volume and create a softer, more romantic look. You can leave a few face-framing pieces out to soften the style. A final spritz of light-hold hairspray will keep everything in place without stiffness.
Tips for Different Hair Types
While this style is universally flattering, a few adjustments can make it work even better for your specific hair type. For Fine or Thin Hair: The biggest challenge is often a lack of volume. Before starting, gently tease the hair at the crown to create a bit of lift. When you pull on the twists to loosen them, be generous; this will create the illusion of fuller hair. Using a volumizing mousse or powder before you begin can also provide a great foundation. For Thick Hair: Your main goal is control and hold. Ensure your bobby pins are securely anchored. You may find that using slightly larger sections helps manage the volume. A fishtail braid incorporated into the half-up style can also be a beautiful and secure alternative for thick hair. For Curly Hair: Embrace your natural texture! This style looks gorgeous on curly hair, as the coils add built-in volume and grip. Use your fingers instead of a brush to section the hair to avoid disrupting your curl pattern. A curl-enhancing cream can help define your curls and reduce frizz before you begin styling.