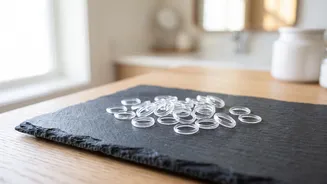







The fishtail braid is an effortlessly chic style, but keeping it neat can be a challenge. Flyaways and loosening strands often ruin the look. Enter the ultimate budget-friendly secret weapon: the clear elastic band. It’s the key to a flawless finish.
The Power of an Invisible Hold
The magic of a clear elastic lies in its near invisibility. Unlike traditional, bulkier hair ties that create a noticeable bump or clash with your hair colour, these tiny bands disappear into the style. This allows the intricate, woven pattern of the fishtail braid to take centre stage. The result is a seamless, professional-looking braid that appears to hold itself together perfectly. Stylists often rely on this trick to give braids a clean, polished finish that looks sophisticated rather than casual. By securing the start and end of the braid with a discreet band, you ensure the structure remains tight and tidy all day long, preventing the common problem of braids loosening and looking messy over time.
Choose Your Bands Wisely
Not all clear elastics are created equal. While it might be tempting to grab the cheapest option, it’s worth seeking out high-quality 'poly-bands'. These are typically made from a soft but durable polyurethane material that offers superior stretch and strength. Cheaper bands, often made of simple rubber or brittle plastic, are prone to snapping mid-braid or becoming tangled and causing breakage upon removal. Good quality poly-bands are designed to be snag-free, gliding against the hair shaft without pulling. Many brands offer bands that are reusable multiple times and are more resistant to breaking, making them a reliable and still very affordable choice for intricate styling. You can find large packs of these high-performance bands at most beauty supply stores or online for just a few dollars, making it an easy and inexpensive upgrade to your hair toolkit.
A Step-by-Step Guide to a Flawless Fishtail
Achieving a clean fishtail braid with clear elastics is simple. First, prep your hair by ensuring it's smooth and detangled. A texturizing spray can add some grip if your hair is freshly washed and slippery. One of the easiest tricks is to start by securing your hair in a low ponytail with a clear elastic. Then, split the ponytail into two even sections. Take a small piece of hair from the outside of the left section, cross it over to the right section, and combine it. Now, repeat on the other side: take a small piece from the outside of the right section and cross it over to the left. Continue this pattern all the way down. The key to a neat look is to maintain consistent tension. Once you reach the end, secure the braid with a second clear elastic. For a truly professional look, you can then carefully use a small pair of scissors to snip and remove the first elastic at the top of the braid. This leaves you with a perfectly secure braid that appears to start seamlessly.
Pro Tips for a Polished Finish
Once your braid is secure, there are a few extra steps to elevate the look. For a fuller, more voluminous braid without sacrificing neatness, gently pull on the edges of the woven sections. This technique, often called 'pancaking', creates a thicker appearance. Because your braid is securely anchored with elastics, you can do this without it falling apart. To combat any flyaways, lightly mist a clean makeup brush or a toothbrush with hairspray and gently smooth it over the surface of the braid. This tames stray hairs without making the style stiff or sticky. Finally, when it's time to take the braid out, avoid the temptation to just pull or rip the elastic, which can cause significant damage. Instead, apply a drop of hair oil or serum directly onto the band; this lubricates it, allowing it to slide out easily. Alternatively, use a specialised elastic-cutting tool, which slides under the band and snips it safely without catching your hair.