


The Golden Rule: Master Your Drainage
The single most important rule for monsoon plant care is to ensure excellent drainage. [8] While it's tempting to focus on pests or fertilisers, almost every major monsoon-related plant problem—from yellowing leaves to sudden death—can be traced back
to one single issue: waterlogged soil. [4, 17] Plants can literally drown when their roots are suffocated by excess water, which cuts off their oxygen supply and leads to decay. [4, 19] This condition, known as root rot, is the number one killer of potted plants during the rainy season. [17] Therefore, your primary mission is not just to avoid overwatering, but to create an environment where it's almost impossible for water to stagnate. [12, 18]
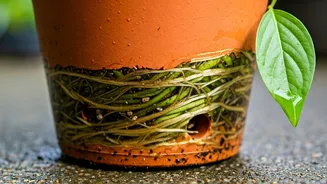
Step 1: Audit Your Pots and Planters
Your first task is to play detective with your pots. Turn each one over and check for drainage holes. Are they present? Are they big enough? Are they blocked? [13] If a pot has no holes, you have two options: drill some yourself or use that pot as a decorative outer cachepot, placing a smaller nursery pot with proper drainage inside. [20, 21] For pots that do have holes, ensure they aren't clogged with soil or roots. A quick poke with a stick can clear the way. [15] Furthermore, never let your pots sit flat on the ground or in a saucer full of water. [10, 19] Elevate them using pot feet, bricks, or small stones to allow air to circulate underneath and water to escape freely. [4, 12, 23]
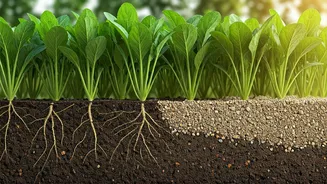
Step 2: Create a Well-Draining Soil Mix
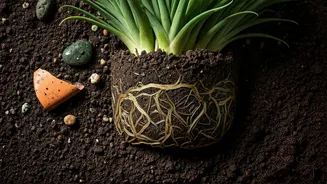
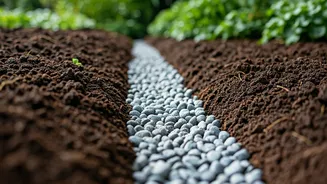
The soil you use is just as critical as the pot itself. Heavy, clay-like garden soil is notorious for retaining water and becoming a dense, airless mass during the monsoon. [9] A good potting mix for containers should be light and airy. You can create your own by mixing garden soil with materials that improve aeration and drainage. [4] Common additives include coarse sand, cocopeat, perlite, or vermiculite. [4, 7] These materials create small air pockets in the soil, allowing excess water to drain through quickly while still retaining enough moisture for the plant. [24] When you water a plant with a well-draining mix, you should see water start to exit the drainage holes almost immediately. [15]
Step 3: Adjust Your Watering Habits
With frequent rains, you must unlearn the habit of watering on a fixed schedule. [4] The air is humid and the soil dries out much more slowly. [10] Always check the soil before reaching for the watering can. The classic finger test is your best friend: stick your finger about an inch or two into the soil. If it feels moist, wait another day or two before watering. [4] Let the top layer of soil dry out slightly between waterings. This simple habit is crucial for preventing the consistently damp conditions that lead to fungal growth and root rot. [10, 16] On days when it rains, nature has already done the work for you. [2]
Supporting Rules for a Healthy Monsoon Garden
While drainage is the main event, a few other practices will support your efforts. First, ensure good air circulation by not overcrowding your plants and by pruning away dead or excessive foliage. [5, 6] This helps leaves dry faster, reducing the risk of fungal diseases like powdery mildew. [12, 14] Second, keep an eye out for pests like slugs, snails, and aphids, which thrive in damp conditions. [2] A preventive spray of neem oil solution every 10-15 days can be highly effective. [2, 13] Finally, remove any fallen leaves or debris from the soil surface, as this material can harbor pests and diseases. [4, 12]