

Choosing Your Indian Flour
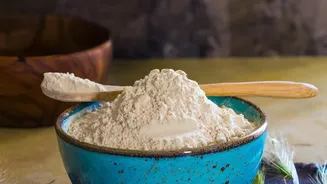
The magic of a sourdough starter comes from the wild yeast and bacteria present in flour. While you can use maida (all-purpose flour), whole wheat atta (chapati flour) is often the best choice for beginners. Atta contains the entire wheat kernel, including
the bran and germ, which are rich in the natural microbes needed to kickstart fermentation. Many bakers find that a 50/50 blend of atta and maida gives an excellent balance: the atta provides the microorganisms and nutrients, while the maida gives the starter a lighter texture. You can start with just whole wheat atta and later maintain your starter with a blend or pure maida if you prefer a lighter-coloured bread.
The Essential Equipment
You don't need specialised gear to begin. All you need is a clean glass jar (at least 500ml), a kitchen scale for accurate measurements, and a spoon or spatula. A digital scale is highly recommended because sourdough success relies on precise ratios of flour and water by weight, not volume. You’ll also want a small piece of cloth or a loose-fitting lid to cover your jar, allowing air to circulate while keeping pests out.
The Daily Feeding Schedule: A 7-Day Guide
Patience is key. Your starter will take about a week to become active and ready for baking. Here's a typical daily schedule: Day 1: In your jar, mix 50g of whole wheat atta with 50g of filtered water (at room temperature). Stir until no dry flour remains. Cover loosely and leave it on your counter. Day 2: You might see a few bubbles, or you might see nothing at all. This is normal. Do nothing today except give it a quick stir. Day 3: You should start to see more bubbles and notice a slightly sour or fruity aroma. It’s time for the first feeding. Discard about half of the starter. Add 50g of atta and 50g of water to the remaining starter. Mix well, cover, and wait. Days 4, 5, & 6: Repeat the process from Day 3 every 12 to 24 hours. Discard about half of the starter before each feeding and add 50g of flour and 50g of water. The activity will become more predictable, with the starter rising and falling a few hours after each meal. Day 7: By now, your starter should be vigorous, full of bubbles, and smell pleasantly tangy. It should be doubling in volume within 4-8 hours of feeding.
Signs Your Starter is Ready
A mature and active starter is ready to bake with when it shows a few key signs. First, it should reliably double in volume within a few hours of being fed. Second, the texture will be bubbly and almost spongy, not dense. You should see lots of bubbles, both large and small, throughout the jar, not just on the surface. The aroma should be pleasantly sour, yeasty, or even fruity—not unpleasantly pungent or like rotten food. A popular method is the "float test": drop a small spoonful of your active starter into a glass of water. If it floats, it's full of gas and ready for your dough.
Tips for the Indian Climate
India's warm and often humid climate can make your starter ferment very quickly. Yeast and bacteria love warmth. If your kitchen is hot (above 28°C), your starter may peak and become hungry in just a few hours. To manage this, you can feed it more frequently, perhaps twice a day. Using cooler water for feedings can also help slow down fermentation. In very hot weather, you might find a stiffer starter (using slightly less water than flour) is more manageable. If your starter is becoming too active, you can store it in the refrigerator after feeding, which will significantly slow it down.
Troubleshooting Common Problems
If your starter isn't bubbling after a few days, it might be too cold or need more frequent feedings. Try moving it to a warmer spot. If you see a dark, alcoholic-smelling liquid (called "hooch") on top, it's just a sign your starter is hungry. Simply stir it back in or pour it off and feed your starter as usual. However, if you see any pink or orange streaks or fuzzy mould, that's a sign of bad bacteria. In that case, you must discard the starter and begin again.