





Why Start with the Wall?
Before you can run, you must walk. In the world of push-ups, the wall version is the essential first step. It works the same key muscles as a standard floor push-up—your chest, shoulders, and triceps—but significantly reduces the load you have to lift.
This makes it an ideal exercise for beginners, individuals recovering from injury, or anyone with wrist or shoulder discomfort. By starting against a wall, you can focus on mastering the movement pattern without the strain of fighting gravity, building a solid foundation of strength and proper form. It also engages your core, as your abdominal muscles work to keep your body stable and in a straight line.
Mastering the Basic Form
Proper form is non-negotiable for getting results and avoiding injury. Stand facing a wall, about an arm's length away. Place your palms flat on the wall, slightly wider than shoulder-width and at about chest height. Your feet should be planted firmly on the floor. Before you begin, engage your core and glutes to create a straight, rigid line from your head to your heels—avoid arching your back or letting your hips sag. Inhale as you slowly bend your elbows, lowering your chest towards the wall. Keep your elbows at a 45-degree angle to your body, not flared out to the sides. Lightly touch your chest or nose to the wall, then exhale as you press firmly back to the starting position with straight arms. The movement should be slow and controlled.
Making It Easier: Regressions
If the standard wall push-up feels too challenging, there are simple ways to reduce the intensity. The easiest adjustment is to move your feet closer to the wall. This makes your body more upright, reducing the amount of body weight your arms and chest have to press. You can also place your hands higher on the wall, which has a similar effect of decreasing the load. Another option is to reduce your range of motion; instead of lowering your chest all the way to the wall, go only as far as you can with good form and gradually work your way deeper over time. The goal is to find a level of difficulty that is challenging but allows you to complete your sets without compromising your form.
Increasing the Challenge: Progressions
Once you can comfortably perform three sets of 15 repetitions with perfect form, it's time to make things more difficult. The most straightforward progression is to walk your feet further back from the wall. This increases the angle of your body, forcing your muscles to work harder against gravity. For a different kind of challenge, slow down the movement, especially the lowering phase. Taking 3-4 seconds to lower your body (an eccentric contraction) increases time under tension, a powerful stimulus for muscle growth. You can also bring your hands closer together to target your triceps more or, for a significant stability challenge, try a one-leg wall push-up by lifting one foot off the ground. The most advanced variation is the one-arm wall push-up, which requires immense core and upper body strength.
Moving Beyond the Wall
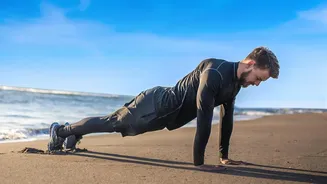
Mastering the wall push-up is a fantastic achievement that opens the door to more advanced exercises. The next logical step is to decrease the incline. You can do this by moving to a sturdy countertop, then a bench or chair, and eventually a low step. Each time you lower the surface your hands are on, you increase the percentage of your body weight you're lifting. This gradual progression is the safest and most effective way to build the strength required for a full push-up on the floor. An alternative is the knee push-up, which involves performing the exercise on the floor with your knees down. Whichever path you choose, focus on maintaining that same rigid body line and controlled movement you perfected against the wall.