





Choose the Right Tools for the Job
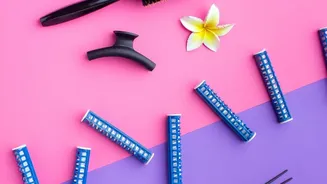
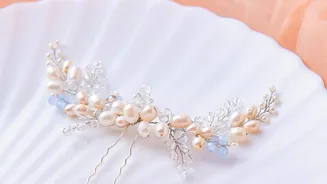
Not all hair pins are created equal, and using the wrong one is a common reason why buns fail. A standard bobby pin, for example, is often too small to anchor the full weight of a bun. For a secure low bun, you need pins designed for the task. U-shaped
pins, also known as French pins or Amish pins, are ideal for securing buns because their wider shape can grab more hair without creating tension that leads to breakage. For very thick or long hair, look for longer, stronger pins, sometimes called 'jumbo' or 'roller' pins, which can navigate through a dense bun and anchor it securely. Another fantastic option is the spin pin, a spiral-shaped tool that twists into the bun like a screw; just two of them can often provide the same hold as a dozen bobby pins.
Prep Your Hair for Success
The texture of your hair plays a huge role in how well your bun will hold. Freshly washed, silky hair is often too slippery for pins to grip effectively. Day-old hair typically has more grit and texture, making it the perfect canvas. If you’re working with clean hair, you can add grip by using a texturizing spray or a bit of dry shampoo at the roots and through the lengths before you begin. This simple step creates a foundation that helps the pins lock into place and prevents the bun from sliding or loosening throughout the day.
How to Create and Pin Your Bun
Start by gathering your hair into a low ponytail at the nape of your neck. For extra security, especially with heavy hair, you can use a hair tie first. Twist the ponytail tightly from the base to the ends. Next, coil the twisted hair around the base of the ponytail to form your bun, holding it in place with one hand. Now for the crucial part: pinning. Take your U-shaped pin and insert it into the outer edge of the bun. The key is to catch hair from the bun, then angle the pin towards your scalp to also catch the 'base' hair underneath, before pushing it back into the bun. This 'scoop and anchor' technique is what truly locks the style in place.
Advanced Pinning for a Bulletproof Hold
For an even more secure hold, think of pinning like the points on a compass. Place your first four pins at the top, bottom, left, and right sides of the bun to create a stable anchor. If you're using bobby pins, crisscrossing two of them to form an 'X' creates a much stronger anchor than using them individually. When inserting any pin, make sure it’s grabbing hair from both the bun and the scalp. For low buns, pins should be inserted pointing upwards to defy gravity. You can also lightly mist your pins with hairspray before inserting them to give them extra gripping power. Once the bun is secure, a final spritz of hairspray over the entire style will help tame any flyaways and provide a finishing touch.
Adapting for Different Hair Types
The amount and type of hair you have will influence your technique. For those with fine hair, a smaller pin might be more effective as a large, heavy pin can weigh the style down. You might also consider using a foam bun maker or 'donut' to create the illusion of a fuller bun. For those with thick, curly, or heavy hair, using more pins is essential. Don't be shy about using 10-15 U-pins to distribute the weight and ensure a solid hold. Longer, 3-inch pins are specifically designed for this hair type and can make all the difference. For curly hair, work with your natural texture, securing the bun loosely to avoid flattening your curls.