


Find Your Celestial Stage
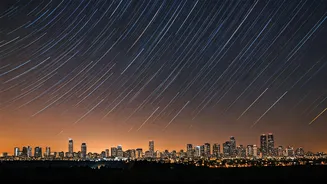
The single most important factor in astrophotography isn't your camera—it's your location. In India, the glow from our bustling cities can wash out even the brightest stars. To capture breathtaking cosmos views, you need to escape this light pollution.
Your mission is to find the darkest spot possible. Use apps like Light Pollution Map or Dark Sky Map to identify areas with minimal interference. Ideally, head out of the city to a national park, a remote beach, or a hilltop viewpoint. Even driving 30-40 kilometres away can make a monumental difference. When you arrive, give your eyes at least 20 minutes to adjust to the darkness. This will help you not only spot fainter stars but also compose your shot more effectively.
The Essential Toolkit
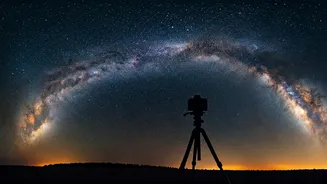
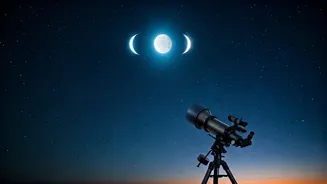
You don't need a space telescope, but a few key items are non-negotiable. The most crucial piece of gear is a tripod. For the long exposures required to capture starlight, your camera must be perfectly still. A shaky hand will result in a blurry mess. This applies to both smartphones and DSLRs. For smartphone users, a simple phone tripod or a GorillaPod will do. For those with a DSLR or mirrorless camera, a sturdy, stable tripod is a must. Beyond that, bring extra batteries, as the cold can drain them quickly. A small torch with a red light mode is also invaluable; red light preserves your night vision, unlike the harsh white light from your phone's screen. Finally, dress in warm layers. Standing still in the cold December night gets chilly fast.
Dialing in Your DSLR/Mirrorless
If you're using a dedicated camera, switch off auto mode and embrace manual settings. Start with your lens. A wide-angle lens (like 14-24mm) is ideal for capturing expansive sky views. Set your aperture to its widest setting (the lowest f-number, like f/2.8 or f/1.8) to let in as much light as possible. Next, set your ISO. Start around ISO 1600 and adjust as needed. A higher ISO brightens the image but can add noise or 'grain'. For shutter speed, a good starting point is the '500 Rule': divide 500 by your lens's focal length. For a 20mm lens, that’s 500 / 20 = 25 seconds. This is the longest you can expose before the stars start to show trails due to the Earth's rotation. Finally, switch to manual focus. Use your camera's live view, zoom in on the brightest star, and adjust the focus ring until it's a sharp pinpoint.
Mastering Your Smartphone
Don't underestimate the power of the phone in your pocket. Modern smartphones have incredible 'Night Mode' capabilities. When mounted on a tripod, this mode automatically takes a long exposure of several seconds. This is your best and simplest option. For more control, check if your phone has a 'Pro' or 'Expert' mode. This allows you to manually adjust ISO, shutter speed, and focus, just like a DSLR. You can experiment with a shutter speed of 10-30 seconds and an ISO of 800-1600. If your native camera app is limited, consider third-party apps like ProCam X (Android) or Slow Shutter Cam (iOS) that unlock long-exposure capabilities. Remember to use a shutter timer or a remote to avoid shaking the phone when you start the photo.
Composing Your Cosmic Shot
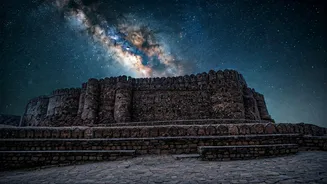
A picture of just stars can be beautiful, but a truly breathtaking image tells a story. Use compositional rules to elevate your photos. The most effective technique is to include a foreground element to give the image scale and context. A silhouette of a gnarled tree, a mountain range on the horizon, a calm lake reflecting the sky, or an old temple can transform your shot from a simple star photo into a compelling landscape. Think about the Rule of Thirds—place the horizon on the lower third line to emphasize the vastness of the sky, or place a key foreground element off-centre. Look for leading lines, like a path or a river, that draw the viewer's eye into the scene and up toward the stars. The goal is to connect the earth with the heavens in a single frame.