




Start with a Solid Foundation
The secret to perfect moisture control begins before you even add water. Your choice of growing medium is critical. Coco coir is a popular and effective option because it holds water exceptionally well while remaining light and airy, which helps prevent
root rot. A fine-particle potting mix specifically designed for seed starting also works well. Whatever you choose, the goal is to create a sponge-like base that retains moisture evenly. Before sowing your seeds, make sure to thoroughly moisten the medium. It should be damp to the touch, like a wrung-out sponge, but not waterlogged. This pre-soaking ensures that seeds have immediate access to the water they need to germinate without you having to disturb them by watering from the top right away.
Embrace the Humidity Dome
During the first few days of germination, your seeds need a high-humidity environment to sprout successfully. This is where a humidity dome is your best friend. A simple clear plastic lid that fits over your tray will trap moisture, creating a mini-greenhouse effect right on your windowsill. This reduces the need for frequent watering and protects the delicate seeds. If you don't have a purpose-built dome, a piece of plastic wrap can work in a pinch. You’ll see condensation form on the inside of the dome, which is a good sign that it's working. Once most of your seeds have sprouted, typically after two to four days, you can remove the dome to increase airflow and prevent issues like mould.
Master the Art of Bottom Watering
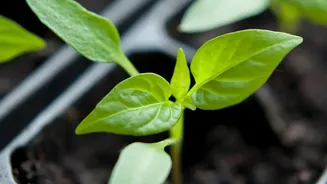
Once your microgreens have germinated and are standing tall, it's time to switch your watering strategy. Top-watering is great for the initial seeding, but it can lead to problems like mould and fungal diseases once the greens become dense. Bottom watering is the superior technique for established microgreens. This method involves pouring water into the bottom tray (the one without drainage holes) and allowing the growing medium to soak up the moisture from below. Let the tray sit in the water for a few minutes, then pour out any excess. This technique encourages strong, deep root growth and keeps the leaves and stems dry, which is essential for preventing rot in a crowded tray. It also ensures even moisture distribution throughout the soil.
Learn to Read the Signs
So, how often should you water? The answer depends on your home's temperature and humidity, but there's a simple way to tell. The weight of the tray is your most reliable indicator. A well-watered tray will feel noticeably heavy, while a dry tray will feel light. Get into the habit of lifting a corner of the tray daily to gauge its weight. The goal is to keep the growing medium consistently moist, not soaking wet. Overwatering is one of the most common mistakes and can lead to root rot and mould, which can ruin an entire crop. If the top of the soil looks dry but the tray still feels heavy, your greens are likely fine. Trust the weight test above all else.
Choose Greens that Grow in a Flash
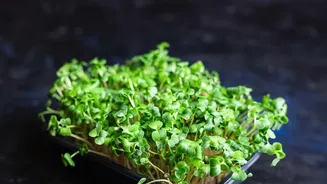
The seven-day harvest promised in the headline is ambitious but achievable with the right varieties. Not all microgreens grow at the same speed. For a quick turnaround, you need to choose fast-growing seeds. Radish microgreens are a classic choice, often ready to harvest in as little as six to eight days. Other speedy options include certain types of mustard, arugula, and some broccoli varieties. These plants germinate quickly and grow vigorously, rewarding your careful moisture management with a fast and flavourful harvest. Slower-growing varieties like basil or cilantro will take longer, so be sure to check the seed packet and plan accordingly for your windowsill garden.