



The Science of a 'Skin'
When you leave dough exposed to air, a process of evaporation begins. Moisture from the surface of the dough moves into the drier surrounding air. This causes the top layer to dry out, forming a tight, inflexible 'skin'. Think of it like a protective
shell forming over your soft, pliable dough. This skin is the primary enemy of a good rise. It happens faster than you might think; even ten minutes of exposure can be enough to start the drying process, especially in a low-humidity environment. Keeping the dough covered traps the moisture, creating a humid micro-environment that keeps the surface soft and supple.
How a Dry Surface Restricts the Rise
The main job of yeast during proofing is to release carbon dioxide gas, which creates bubbles that make the dough expand. For the dough to rise properly, its surface needs to be elastic and able to stretch. A dry, leathery skin does the exact opposite — it constricts the dough. This physical barrier limits the dough's ability to expand, resulting in a sluggish or incomplete rise. A loaf that should be light and airy can turn out dense and squat. In some cases, as the gases inside continue to build pressure, they can burst through weak spots in the hardened crust, leading to unsightly cracks and an uneven final shape.
Impact on Final Texture and Crust
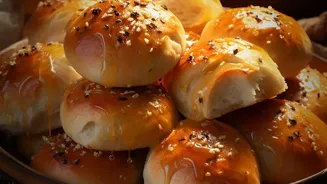
The problems caused by a dry surface don't disappear in the oven. That premature crust developed during proofing doesn't just go away; it gets baked into the final product. The result is often a tougher, thicker, and less appealing crust than you intended. Instead of a beautifully browned and crisp exterior that gives way to a soft crumb, you can end up with a hard, chewy layer. Furthermore, if you try to knead the dry skin back into the dough after the first rise, it won't incorporate smoothly. Instead, it breaks into small, hard flakes that create unpleasant lumps throughout your finished bread. Protecting the dough's moisture is essential for achieving that desirable contrast between a tender interior and a perfect crust.
Best Methods for Covering Dough
While the goal is simple, there are several effective ways to cover your dough, each with its own advantages. A common but debated method is using a tea towel. While traditional, a dry towel is porous and still allows air to circulate and heat to escape, which can slow fermentation. If you use a towel, it's better to use a slightly damp one to increase humidity. A more effective and popular option is plastic wrap, which creates an excellent airtight seal, but it is a single-use plastic. For a reusable and highly effective solution, consider a dedicated plastic or silicone bowl cover, which provides a snug fit. You can also get creative with items you already have; simply inverting the bowl you mixed in over your dough as it rests on the counter works perfectly. A large pot lid or even a sheet pan can also serve as a great non-porous cover.
What About Oiled Dough or Special Cases?
Some recipes call for oiling the dough before its first rise. This light coating of oil acts as a physical barrier against moisture loss and can be effective, especially for shorter resting periods. However, it's not a foolproof solution for a long fermentation. There are exceptions to the rule. Some very high-hydration doughs might be left uncovered in the fridge to help wick away a bit of excess moisture, which can make them easier to handle. Similarly, specific breads like focaccia, which are often coated in oil, or tiger bread, which has a special paste applied, may be intentionally left uncovered to achieve their signature crusts. But for the vast majority of everyday breads, buns, and pizza doughs, covering is a non-negotiable step for success.