


Why Composting Matters in the City
Living in a bustling Indian city often means limited space and a constant battle with overflowing bins. Composting offers a simple, powerful solution. It allows you to recycle a significant portion of your household waste, reducing the burden on already
strained landfills. In return, you get a free, steady supply of nutrient-rich, organic fertilizer. This homemade compost is perfect for nurturing balcony gardens, potted plants, and terrace vegetable patches, improving soil health and helping your plants thrive without chemical additives. It's an empowering way to make a tangible environmental impact from your own home.
Gathering Your 'Zero Cost' Materials
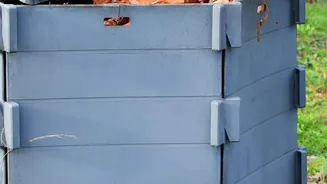
The promise of a zero-cost setup is entirely achievable by repurposing common household items. You don't need to buy expensive, ready-made kits. The star of the show is a simple container. An old 20-litre paint bucket, a large plastic storage bin, or even a sturdy terracotta pot (khamba) will work perfectly. Many of these can be sourced for free from your own home, a local scrap dealer, or from neighbours. The only other 'tool' you'll need is something to create holes, like a drill or a heated metal rod, to ensure proper aeration, which is critical for the aerobic process.
Building Your Bin: A 5-Minute Guide
Once you have your bucket or bin, converting it into a composter is incredibly simple. The key is aeration. Aerobic composting relies on oxygen to help microorganisms break down waste without creating a foul smell. First, drill about 10-15 small holes in the bottom for drainage. Next, drill vertical lines of holes around the sides of the bucket, from top to bottom. This allows air to circulate freely throughout the pile. Finally, drill a few holes in the lid. To improve bottom drainage and airflow, you can place a few stones or a small stand under the bucket. That's it—your DIY compost bin is ready for action.
The Perfect Compost Recipe: Greens and Browns
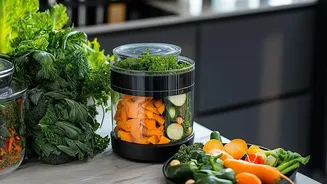
Successful composting is all about balance. Think of it as a recipe with two main ingredient groups: 'greens' and 'browns'. 'Greens' are nitrogen-rich materials from your kitchen. This includes raw vegetable and fruit peels, crushed eggshells, used tea leaves, and coffee grounds. 'Browns' are carbon-rich dry materials like shredded newspaper, cardboard, dried leaves, and cocopeat. The golden rule is to layer them. For every part of 'greens' you add, cover it with an equal or slightly greater amount of 'browns'. This simple step is the secret to preventing smells, absorbing excess moisture, and creating the ideal environment for decomposition.
What to Add and What to Avoid
Your aerobic bin will happily accept most raw, plant-based kitchen scraps. However, for a simple, odour-free process, it's best to avoid certain items. Steer clear of cooked foods (especially oily curries, dal, or rice), meat, fish, bones, and dairy products like paneer and curd. These materials can create foul odours and attract pests. Stick to raw fruit and vegetable waste, tea and coffee grounds, eggshells, and pooja flowers. Always chop larger scraps into smaller pieces to help them break down faster.
Maintaining a Healthy, Odour-Free Bin
The most common fear for apartment composters is bad smell. Fortunately, this is easily preventable. A foul odour, often like rotten eggs, is a sign that your pile is anaerobic (lacking oxygen), usually because it's too wet. The fix is simple: add more 'browns' like shredded cardboard or dry leaves to absorb the moisture and gently mix the pile to introduce air. Your compost should feel like a wrung-out sponge—moist, but not dripping wet. Turn the pile with a rake or stick every four to five days to keep it aerated. Always keep the lid on, but not airtight, to protect it from rain and pests.