
The Unique Challenge of Shell Planters
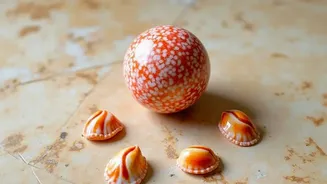
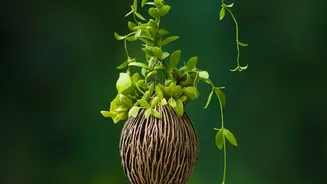
Shell planters, whether a single large shell holding a succulent or a pot adorned with many smaller shells, offer a beautiful, natural aesthetic. Unlike standard ceramic or plastic pots, they can be irregularly shaped, heavier, and sometimes more fragile.
This uniqueness is their charm, but it also means you need to pay extra attention to how you hang them. Proper drainage can also be a concern; if your shell doesn't have a drainage hole, you may need to drill one carefully to prevent root rot. A layer of pebbles at the bottom can help, but nothing beats a proper escape route for excess water.
Choosing a Cord That Carries the Load
The cord is the lifeline of your hanging planter. Your choice impacts both safety and style. Natural fibers like jute, hemp, and cotton macrame offer a rustic, bohemian look. Hemp is particularly strong and water-resistant, making it a great choice for heavier pots. Jute is also strong with excellent knot-holding ability. Cotton is soft and easy to work with but may be best for lighter, indoor planters. For maximum strength, weather resistance, and peace of mind with very heavy planters, synthetic options like nylon or even thin steel wire or chains are excellent choices. Always check the weight rating of any cord you purchase and remember that a watered plant is significantly heavier than a dry one.
The Art of a Balanced Pot
An unbalanced planter will hang crookedly and put undue stress on the cord and anchor point. This is especially true for irregularly shaped shell planters. Before you even add your plant, hold the planter by the hanger to see how it sits naturally. You may need to add soil and your plant strategically to achieve a level presentation. Think of it like a balancing act. For heavier planters that might be prone to tipping in the wind, some people add a layer of pebbles or small stones at the bottom before adding soil. This not only aids drainage but also lowers the center of gravity, making the planter more stable.
Anchoring Your Plant with Confidence
The most secure cord is useless if the ceiling anchor fails. The hardware you need depends entirely on your ceiling type. The safest option is to locate a wooden ceiling joist using a stud finder and drive a sturdy screw hook directly into it. This provides the strongest possible anchor point for heavier plants. If a joist isn't in the right spot, you must use a drywall anchor. For anything heavier than a very small plant, a standard plastic anchor won't suffice. Opt for a toggle bolt or swag hook with spring-loaded wings. These anchors pass through the drywall and open up on the other side, distributing the weight over a larger area to prevent the hook from tearing out of the ceiling. Always adhere to the weight limits specified on the hardware packaging.
Installation: Measure Twice, Drill Once
Once you've chosen your spot, cord, and hardware, the final assembly can begin. First, confirm the location and use a stud finder to check for a joist. Drill a pilot hole slightly smaller than the threads of your screw hook. If you are drilling into a joist, simply screw the hook in until it's secure. If using a toggle anchor, drill the larger hole specified on the packaging, then pinch the toggle wings together and push them through the hole until they spring open. Tighten the hook until it is flush with the ceiling, ensuring a snug fit. Finally, attach your beautifully balanced planter, step back, and admire your floating work of art.