
The Crucial Role of Sunlight
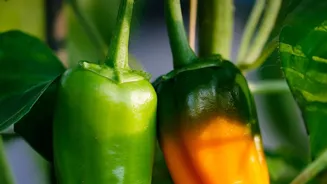
Thai chilli plants are sun-worshippers. To thrive and produce a bountiful harvest, they require at least six to eight hours of direct, unfiltered sunlight every day. This exposure is essential for photosynthesis, the process where the plant converts light into
energy for growth, flowering, and fruiting. If you're growing your chillies on a balcony or windowsill, a south-facing spot is ideal as it typically receives the most intense and prolonged light. Without adequate sun, plants may become 'leggy' (tall and thin) and produce very few, if any, chillies. If you notice your plant's leaves drooping in the intense afternoon sun, don't panic. This is often a natural response to reduce water loss, and the plant should recover by evening.
Perfect Potting and Soil
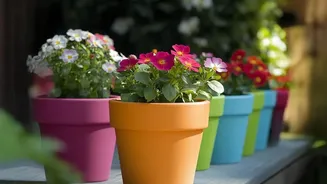
Choosing the right home for your plant is the first step. Select a pot that is at least 12 inches deep to give the root system ample space to grow. Crucially, ensure the pot has drainage holes at the bottom. Chillies despise 'wet feet', and waterlogged soil can quickly lead to root rot, a fatal condition. The ideal soil mix should be well-draining yet rich in organic matter. A great DIY mix for Indian conditions combines standard potting soil with amendments like compost or cocopeat to retain some moisture, and perlite or coarse sand to improve drainage. This creates a light, airy medium that healthy roots love.
Watering: A Delicate Balance
Consistent watering is key, but overwatering is one of the most common mistakes gardeners make. The best rule of thumb is the 'finger test': insert your finger about an inch into the soil. If it feels dry, it's time to water. If it still feels moist, wait another day. When you do water, do it thoroughly until you see water escaping from the drainage holes. This ensures the entire root ball is hydrated. Then, allow the soil to dry out partially before the next watering. This cycle encourages strong root development as they search for moisture. During peak summer heat, you may need to water daily, but always check the soil first.
Feeding for More Fruit
While good soil provides a great start, potted chilli plants are heavy feeders and will need additional nutrients throughout the growing season. About four to six weeks after planting, you can start applying a balanced liquid fertiliser. Early on, a feed with sufficient nitrogen helps develop lush, green foliage. However, once the plant starts to flower, switch to a fertiliser that is higher in potassium (the 'K' in NPK). Potassium is vital for flower and fruit development. You can use a commercial tomato feed or organic options like vermicompost (earthworm castings) or a diluted fish emulsion, applied every two to four weeks.
Pruning for a Bushier Plant
Pruning might seem counterintuitive, but it can significantly boost your yield. When the plant is about 25-30 cm tall, snipping off the top growing tip encourages it to send out side shoots. This creates a bushier, stronger plant with more branches, which means more sites for flowers and chillies to form. Throughout the season, you can also remove any yellowing leaves or small, weak shoots (suckers) that appear low on the main stem. This helps the plant direct its energy toward producing fruit rather than unnecessary foliage.
Managing Common Pests
Potted chilli plants in India can sometimes attract pests like aphids, thrips, and spider mites. These tiny insects suck sap from the leaves, causing them to curl and stunting the plant's growth. Regularly inspect the undersides of leaves for any signs of infestation. For minor issues, a strong spray of water can dislodge many pests. For more persistent problems, neem oil is an effective organic solution that is widely available in India. Ensuring good air circulation around your plant by pruning can also help prevent fungal diseases like powdery mildew.