


Beyond Butter and Chutney
Let’s be honest: the coating makes the sandwich. It’s the first layer of flavour, the barrier that stops your bread from getting soggy, and the element that ties everything together. For years, the choice has been predictable. A slick of butter for richness,
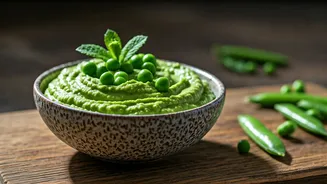
a layer of mayonnaise for creaminess, or a smear of green chutney for a spicy, herby kick. But what if one single spread could do it all? Enter the mint and green pea mash. It has the natural, velvety creaminess of mashed peas, replacing the need for heavy fats like butter or mayo. It boasts the herbaceous, cooling freshness of mint, rivalling any chutney. And its colour—a stunning, vibrant green—makes any sandwich look like it came from a gourmet café. It’s not just a spread; it’s a complete upgrade, offering flavour, texture, and visual appeal in one simple dollop. It's the healthy, modern multitasker your lunchbox has been waiting for.
The Simple, Glorious Recipe
The beauty of this mash lies in its simplicity. You need minimal ingredients and less than 15 minutes to create a batch that will last you for several days. It’s a low-effort, high-reward kitchen hero.
**Ingredients:**
- 2 cups frozen green peas
- 1 large handful of fresh mint leaves (about 1 cup, loosely packed)
- 1-2 cloves of garlic, roughly chopped (optional, for a savoury kick)
- Juice of half a lemon (or to taste)
- 2 tablespoons olive oil (optional, for extra smoothness)
- Salt and freshly ground black pepper to taste
- 2-3 tablespoons of water, if needed to adjust consistency
**Method:**
1. **Blanch the Peas:** Bring a small pot of salted water to a boil. Add the frozen peas and cook for just 2-3 minutes, until they are bright green and tender. This quick cooking step is crucial for colour and texture.
2. **Shock the Peas:** Immediately drain the peas and plunge them into a bowl of ice water. Let them sit for a minute to cool completely. This 'shocking' process locks in their vibrant green colour.
3. **Blend Everything:** Drain the cooled peas well. Transfer them to a food processor or a blender. Add the mint leaves, garlic (if using), lemon juice, and olive oil (if using).
4. **Pulse and Season:** Pulse the mixture until it forms a coarse, rustic mash. If you prefer it smoother, blend for longer. Add a splash of water if the mixture is too thick to blend properly. Season generously with salt and pepper. Taste and adjust the lemon juice or salt as needed. That’s it. Your mash is ready to use.
How to Build Your Sandwich
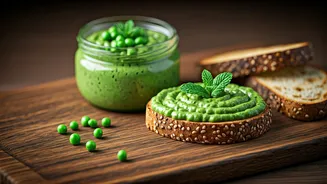
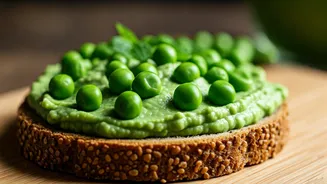
This mash is incredibly versatile, but it truly shines as a sandwich coating. It provides a creamy, moist base that complements a wide range of fillings. Start by spreading a thick layer on your favourite bread—whole wheat, multigrain, or even a simple white slice works perfectly.
- **The Classic Veggie:** Layer with thinly sliced cucumber, tomato, and red onion for a quintessential Mumbai-style sandwich, but with a fresh, modern twist. The pea mash provides the perfect cooling counterpoint to the crisp vegetables.
- **The Paneer Power-Up:** For a protein-packed lunch, pair the mash with slices of grilled or pan-fried paneer. The soft, mild cheese is a perfect canvas for the zesty, minty spread.
- **The Upgraded Cheese Toastie:** Forget plain butter. Spread the pea mash on your bread before adding a slice of cheese (Amul, cheddar, or mozzarella work well) and toasting until golden and gooey. The freshness cuts through the richness of the cheese beautifully.
- **Beyond Sandwiches:** Don't limit yourself. Use it as a dip for vegetable sticks or crackers, a side for grilled chicken or fish, or even as a filling for parathas. It’s a true kitchen all-rounder.
Tips for the Brightest, Best Mash
To ensure your mash is perfect every time, keep a few simple tips in mind. First, don't skip the blanching and shocking step for the peas. Boiling them from frozen and then cooling them in ice water is the secret to that impossibly bright green colour. Overcooking will turn them a dull, olive green. Second, use the freshest mint you can find; tired, wilted leaves will lack the potent, fresh flavour that makes this spread special. Finally, control the texture yourself. For a chunkier, more rustic feel, pulse just a few times in the food processor. For a silky-smooth purée, let it blend for longer and consider adding that touch of olive oil for extra creaminess. Always taste and adjust seasoning at the end—a final squeeze of lemon juice can reawaken all the flavours.