


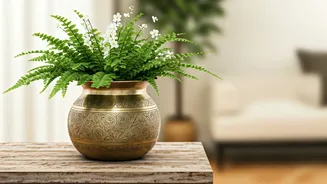


Embrace the Heirloom
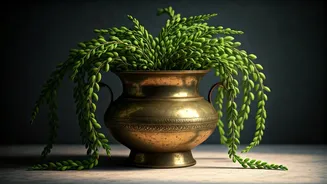
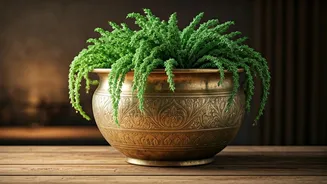
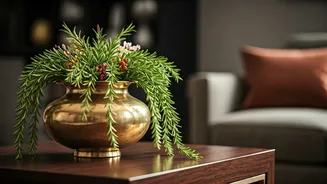
Many Indian homes have them: the magnificent *uruli*, the large *varpu*, or other traditional brass vessels passed down through generations. Once used for cooking festive meals or holding floral arrangements, they now often sit empty, their cultural significance
overshadowed by their sheer weight and size. But their ornate beauty and sturdy form make them perfect candidates for a second life. Repurposing these items as planters not only adds a touch of grandeur to your decor but also honours the craftsmanship of a bygone era. It's a sustainable way to blend heritage with contemporary interior design, creating a focal point that tells a story.
Step 1: The All-Important Drainage
Before you add a single scoop of soil, you must address drainage. Without it, water will stagnate, leading to root rot that will kill your plant. You have two main options. The best method is to drill several small holes (about 1/4 to 1/2 inch in diameter) in the bottom of the pot. To do this, turn the pot upside down on a stable, soft surface like a thick towel. Use a power drill with a bit specifically designed for metal. Start with a smaller pilot hole, then widen it. Go slowly and apply steady pressure. If you are hesitant to permanently alter an heirloom, there’s a no-drill alternative: simply place a smaller plastic pot with drainage holes inside the brass vessel. You can place a few pebbles at the bottom of the brass pot to elevate the inner pot, ensuring it never sits in collected water.
Step 2: Polish and Protect
Next, it's time to bring back that legendary brass gleam. For a traditional, eco-friendly clean, make a paste of tamarind pulp and salt, or use lemon halves dipped in salt. Rub this mixture all over the surface, let it sit for a few minutes, and then scrub gently with a soft cloth or coconut coir before rinsing thoroughly. For tougher tarnish, commercial brass polishes like Brasso work wonders. Once clean and dry, you must protect the interior. Constant contact with damp soil and water will cause the brass to corrode and tarnish quickly. To prevent this, apply a waterproof sealant. A clear, marine-grade varnish or a spray-on polyurethane sealant will create an invisible barrier, preserving the metal's integrity and shine for years.
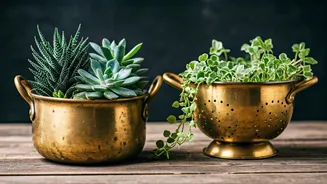
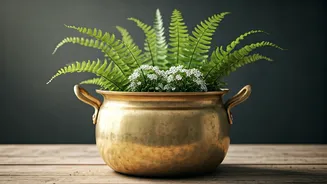
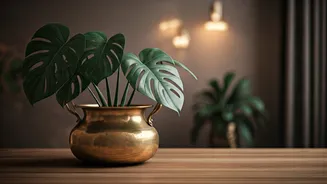
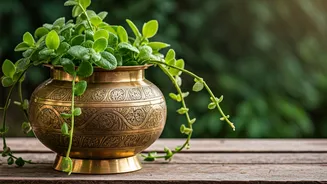
Step 3: Choose Your Greenery
The golden hue of brass pairs beautifully with a wide variety of plants. For a dramatic, overflowing effect, consider trailing plants like money plant (Pothos), English ivy, or string of pearls. Their cascading leaves will soften the hard lines of the metal pot. If you prefer something more upright and architectural, snake plants, ZZ plants, or small fiddle leaf figs are excellent, low-maintenance choices. For a touch of the tropics, a bird of paradise or an alocasia can create a stunning visual. Remember that metal pots can get hot in direct sunlight, so if your planter will be outdoors or near a sunny window, choose heat-tolerant plants like succulents, bougainvillaea, or ornamental grasses.
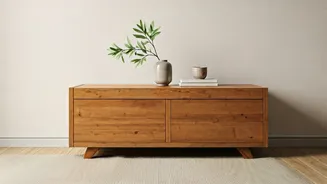
Step 4: Potting and Placement
With your pot prepped and your plant selected, you're ready to assemble your masterpiece. If you drilled holes, you can add a layer of broken terracotta pieces or small stones to the bottom to improve drainage before filling with a high-quality potting mix. If you're using the inner-pot method, simply place it inside. Gently remove your plant from its nursery pot, loosen the root ball, and place it in the planter. Fill the surrounding space with soil, pressing down lightly to remove air pockets. Water the plant thoroughly until you see water drain from the bottom. Now for the fun part: placement. A large brass planter makes an incredible statement piece in an entryway, a living room corner, or on a balcony. Place it where it will get the appropriate amount of light for the plant and where its beauty can be fully appreciated.