


Start with Smart Preparation
Before you can think about paint colours or new hardware, every successful upcycling project begins with proper preparation. This is the crucial foundation for a professional-looking finish. First, give the chest a thorough cleaning inside and out with a mild
soap and water solution to remove decades of dust and grime. Let it dry completely. Next, assess the surface. If the existing varnish or paint is peeling, you’ll need to sand it down. Start with a medium-grit sandpaper (around 120-grit) to smooth the surface, and finish with a fine-grit (220-grit) for a flawless feel. Always sand in the direction of the wood grain. If you plan on painting, applying a coat of primer is non-negotiable. Primer helps the paint adhere better, prevents old stains from bleeding through, and results in a more even and durable colour.
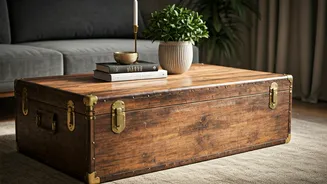
Idea 1: The Classic Coffee Table
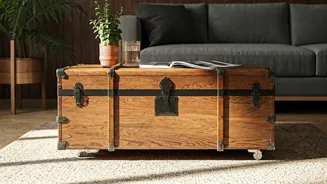
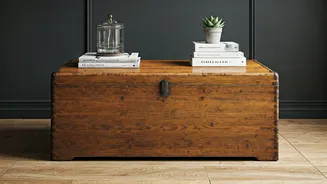
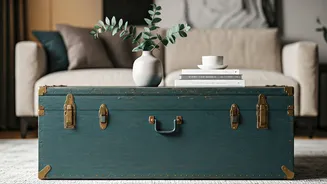
One of the most popular and practical ways to upcycle a wooden chest is to turn it into a coffee table. Its generous surface area is perfect for holding drinks, books, and decorative items, while the interior offers hidden storage for blankets, board games, or magazines. For this transformation, consider the finish carefully. If you love the natural wood grain, sand off the old finish and apply a rich stain followed by several coats of a durable polyurethane sealer to protect it from spills and scratches. For a more modern or farmhouse look, chalk paint is an excellent choice as it requires minimal prep and provides a beautiful matte finish. A neutral colour like off-white, grey, or navy blue can seamlessly integrate the chest into your existing decor. Ensure the height works with your sofa for comfortable use.
Idea 2: The Boho Storage Bench
If your living room needs extra seating and a touch of eclectic charm, convert your vintage chest into a bohemian-inspired storage bench. This works especially well for chests that are sturdy and at a comfortable seating height. After prepping and painting the chest—perhaps in a vibrant jewel tone like emerald green or a distressed earthy terracotta—the key is the cushion. Have a piece of high-density foam cut to the exact dimensions of the lid. Cover it with a fabric that screams personality: think block prints, kantha stitch textiles, or a bold kilim pattern. You can attach the cushion with fabric ties or adhesive strips for a non-permanent solution. This dual-purpose piece not only adds seating but also infuses your space with colour, texture, and a free-spirited vibe.
Idea 3: The Minimalist Media Console
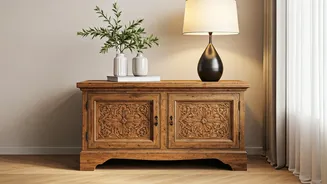
Long, low-profile chests are ideal candidates for becoming sleek, minimalist media consoles. They provide a sturdy platform for a television and offer concealed storage for unsightly cables, remotes, and gaming consoles. To achieve a minimalist aesthetic, opt for a clean, simple finish. A crisp white, a deep charcoal, or even a smooth black semi-gloss paint can create a modern look. Replace any ornate, old-fashioned hardware with simple, geometric pulls or knobs in a matte black or brushed metal finish. The most important step for this project is functionality. You will likely need to drill a few holes in the back panel of the chest using a hole saw attachment on your drill. This allows you to neatly route power cords and HDMI cables, keeping your entertainment area tidy and clutter-free.
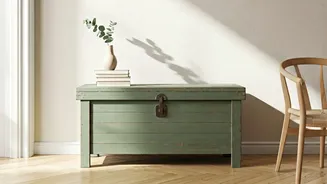
Idea 4: An Unexpected Entryway Statement
While intended for the living room, a beautifully upcycled chest can also make a powerful first impression in your entryway. It serves as the perfect 'drop zone' for keys and mail, with hidden storage for shoes, umbrellas, or shopping bags. For an entryway piece, consider a bold and welcoming statement. A high-gloss paint in a cheerful colour like sunshine yellow or a calming sage green can set a positive tone for your entire home. You could also get creative with stencils to add a pattern or a welcoming word. Above the chest, hang a stylish round mirror and place a small decorative tray on top to complete the vignette. It’s a functional and fashionable solution that instantly elevates an often-overlooked space.
Don't Forget the Finishing Touches
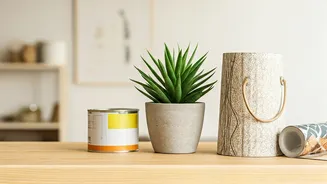
The small details are what elevate a DIY project from homemade to high-end. Swapping out old, dated hardware is one of the easiest and most impactful changes you can make. Look for new knobs or pulls that match your desired aesthetic—be it leather pulls for a rustic look, brass handles for a vintage glam feel, or sleek metal bars for a modern touch. Another delightful surprise is to line the inside of the chest. Use peel-and-stick wallpaper or a beautiful fabric remnant to add a pop of pattern and colour that greets you every time you open the lid. Finally, always finish your piece with a protective topcoat. A clear wax over chalk paint or a water-based polyurethane over other paints will protect your hard work from wear and tear, ensuring your upcycled treasure lasts for years to come.