



A Sweet Steeped in Legend
The Mathura Peda is more than just a dessert; it's a piece of cultural heritage. Originating from Mathura, the sacred birthplace of Lord Krishna, this sweet has been offered as 'prasad' in temples for centuries. Its history is deeply intertwined with
the lore of Krishna, whose fondness for milk and milk-based sweets is legendary. This connection elevates the peda from a simple confection to a symbol of devotion, making it an essential part of Janmashtami celebrations across India.
What Makes Mathura Peda Unique?
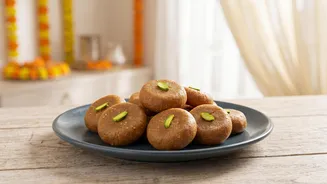
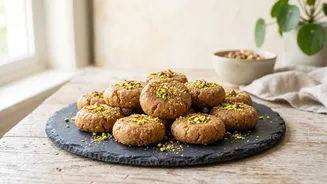
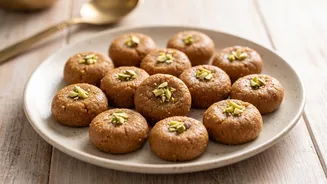
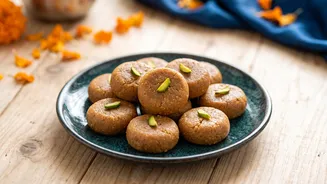
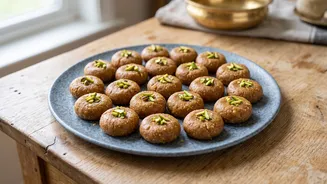
Unlike the common white, soft pedas, the Mathura Peda is distinguished by its rich, dark brown colour and a distinct grainy, or 'danedar', texture. This unique characteristic comes from the meticulous process of roasting khoya (milk solids) for a long time over a low flame. The slow caramelisation of the milk solids imparts a nutty, deeply aromatic flavour that is simply unforgettable. The traditional sweetener used is 'boora' or 'tagar', a type of unrefined powdered sugar that adds to its unique texture.
Gathering Your Ingredients
The beauty of this recipe lies in its simplicity. You only need a few key ingredients, so quality is paramount. Khoya/Mawa: 250 grams. This is the soul of the peda. Use good quality, unsweetened mawa, preferably the 'danedar' or 'hariyali' kind. You can find it at most Indian grocery stores. Ghee (Clarified Butter): 2-3 tablespoons. Ghee is crucial for roasting the khoya and preventing it from sticking, adding a rich, nutty aroma. Sugar: ½ cup of 'Boora' or 'Tagar'. If you can't find it, you can substitute with finely powdered sugar. Adjust the quantity to your taste. Milk: 2-3 tablespoons. A small amount is used to adjust the consistency and add moisture. * Cardamom Powder: ½ teaspoon. For that classic, fragrant finish.
The Art of Roasting Khoya
This is the most crucial step and requires patience. Crumble or grate the khoya and place it in a heavy-bottomed, non-stick pan. Begin roasting on a low-medium flame, stirring continuously. After about 5 minutes, it will start to look dry. Add a tablespoon of ghee and continue to stir and roast. The khoya will gradually change colour from white to light cream, then to a golden brown. Keep scraping the sides and bottom of the pan. This process can take anywhere from 20 to 40 minutes. You are looking for a deep, uniform dark brown colour, similar to coffee grounds. Don't rush this step, as it's where the flavour develops. Once browned, remove from heat and let it cool slightly.
Step-by-Step Recipe Guide
1. Once the roasted khoya has cooled down a bit but is still warm to the touch, transfer it to a large bowl. If the mixture is lumpy, you can briefly pulse it in a blender to achieve a smoother, grainy powder. 2. Add the cardamom powder and the boora (or powdered sugar) to the warm khoya mixture. Do not add sugar to hot khoya, as it will melt and turn the mixture into a paste. 3. Mix everything thoroughly. The warmth of the khoya will help the sugar incorporate evenly. 4. At this stage, the mixture might feel dry and crumbly. Add milk, one tablespoon at a time, just enough to help bind the mixture into a dough-like consistency that you can shape. 5. Take small, equal-sized portions of the mixture and roll them into smooth balls between your palms. Then, gently flatten them to create the classic peda shape. 6. Traditionally, these pedas are rolled in a little extra boora or caster sugar for a final coating. This is optional but adds to the authentic look and texture.
Tips for Perfect Pedas
To ensure your pedas turn out perfectly, keep a few things in mind. First, use a heavy-bottomed pan to prevent the khoya from burning. Continuous stirring on a low flame is non-negotiable for even roasting. If your mawa is very dry, you might need a little more milk for binding, but add it cautiously to avoid making the mixture soggy. The colour is key; aim for a rich brown, not just a light golden hue. Store the finished pedas in an airtight container. They stay fresh at room temperature for a few days and can be refrigerated for up to a week.