

Why Quarantine Is Non-Negotiable
The single most common way destructive pests enter our homes is by hitchhiking on new plants. Even a plant that looks perfectly healthy at the nursery can harbour tiny insects or their eggs, which are often invisible to the naked eye. Pests like spider
mites, mealybugs, thrips, and scale can quickly multiply and spread to your existing plants, creating a widespread infestation that is difficult and stressful to manage. Quarantining a new plant creates a crucial observation period. It allows time for any hidden issues, including pests or diseases, to become visible before the plant is introduced to your collection. Think of it as a small investment of time that offers huge returns in the form of a healthy, thriving indoor garden.
Setting Up a Quarantine Zone
An effective quarantine requires true isolation. Simply placing a new plant on a different shelf in the same room is not enough, as some pests, like fungus gnats, can fly, while others can travel short distances between pots. The ideal quarantine space is a separate room where you have no other plants. A guest bathroom, a laundry room, or a spare bedroom works well. If you are short on space, you can create a temporary isolation chamber by placing the plant inside a large, clear plastic bag, ensuring it has airflow and is not in direct sunlight, which could cook the plant. Regardless of the location, the quarantine period should last for a minimum of two weeks, though four to six weeks is considered safer, as it covers the life cycles of slower-developing pests like mealybugs.
The Thorough Leaf and Stem Check
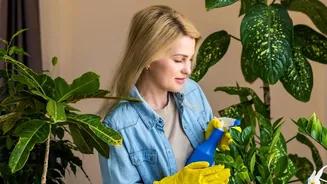
Your first inspection should be a detailed one. Carefully examine every part of the foliage, paying close attention to the undersides of leaves, where many pests love to hide. Look for signs like fine webbing, which indicates spider mites, or small, cotton-like white masses, a tell-tale sign of mealybugs. Check the points where leaves meet the stems, another common hiding spot. Tiny green or black specks could be aphids, while small, hard brown bumps are likely scale insects. Any sticky, shiny substance on the leaves, known as honeydew, is a residue left by pests like aphids and scale. Also, look for discolouration, such as yellowing, brown spots, or silvery streaks, which can be symptoms of pest damage or disease.
Investigating the Soil and Roots
Pests don't just live on leaves; many make their home in the soil. To inspect the soil, look for tiny black flies hovering around the plant, which are likely fungus gnats. Their larvae, which can damage roots, live in the moist top layer of soil and look like tiny white worms. You may also encounter pests like springtails, which are tiny insects that jump when disturbed. For a deeper check, gently slide the plant out of its pot to inspect the root ball. Healthy roots are typically firm and white or light-coloured. Brown, soft, or mushy roots are a sign of root rot, often from overwatering. While inspecting the roots, look for cottony white clusters, which are a sign of root mealybugs, a pest that is impossible to spot from the surface.
Don't Overlook the Pot Itself
The pot is the final piece of the puzzle. Pests and their eggs can hide in the crevices of a container, especially under the rim and in or around the drainage holes. Before bringing a plant home, it's wise to check these areas. If you plan on repotting your new plant, it is critical to use a clean pot. Unwashed pots can harbour disease pathogens and pest eggs from previous inhabitants. To properly sanitise a used pot, first scrub away all soil and debris with soap and water. Then, disinfect it by soaking it for at least 10 minutes in a solution of one part household bleach to nine parts water. After soaking, rinse the pot thoroughly with clean water and let it dry completely before use. This step ensures you aren't accidentally introducing old problems to your new plant.