
Understanding the Movement
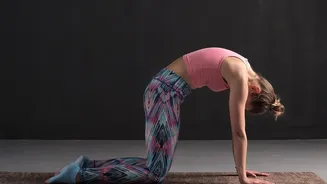
Cat-Cow isn't one pose, but a dynamic sequence of two: Marjaryasana (Cat Pose) and Bitilasana (Cow Pose). The practice involves moving rhythmically between them while on your hands and knees. The headline terms, 'spinal flexion' and 'spinal extension',
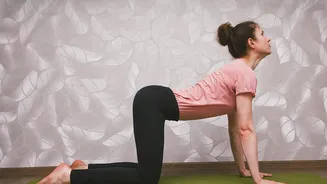
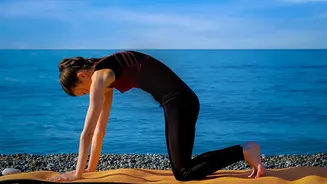
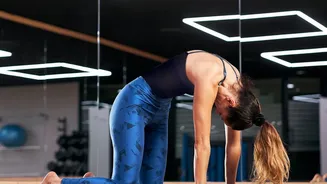
simply describe the two key actions. Spinal flexion is the forward rounding of your back, like a cat arching its spine. In contrast, spinal extension is the gentle backward arch, where the belly drops and the chest opens. This flow is a cornerstone of many yoga practices because it gently awakens the spine and connects the mind to the body through controlled breathing.
The Key Benefits of a Gentle Flow
Don't let its simplicity fool you; Cat-Cow is a powerhouse of benefits. Its primary function is to improve the flexibility and mobility of your spine, which can help counteract the stiffness that comes from long hours of sitting. Regularly practicing this flow can relieve tension in the back, neck, and shoulders. The movement also serves as a gentle massage for the abdominal organs, which can aid in digestion. Mentally, the act of coordinating your breath with the movement calms the nervous system, helping to reduce stress and improve focus.
A Step-by-Step Guide
Finding the correct form from the start will help you get the most out of the pose. Follow these steps to practice Cat-Cow safely and effectively: 1. Start in Tabletop Position: Come onto your hands and knees. Align your wrists directly under your shoulders and your knees directly under your hips. Your back should be flat, creating a 'tabletop' with your torso. Spread your fingers wide to distribute your weight evenly. 2. Inhale into Cow Pose (Bitilasana): As you take a slow inhale, drop your belly toward the mat. Lift your chest and tailbone, creating an arch in your spine. Allow your gaze to lift forward gently, but be careful not to crunch your neck. 3. Exhale into Cat Pose (Marjaryasana): As you exhale, round your spine toward the ceiling. Tuck your chin to your chest and release your tailbone down. Gently press the floor away with your hands to deepen the stretch between your shoulder blades. 4. Continue the Flow: Repeat this sequence, moving from Cow on your inhales to Cat on your exhales. Aim for 5 to 10 slow, deliberate rounds. The goal is to create a fluid, continuous motion linked to your breath.
Common Mistakes to Avoid
To ensure a safe and effective practice, be mindful of a few common errors. Many beginners move too quickly, rushing through the poses without connecting to the breath. Slow down to feel the full stretch in each vertebra. Another common mistake is poor alignment, such as having hands too far forward or knees too wide. Always start by checking that your wrists are under your shoulders and knees are under your hips. Finally, avoid collapsing into the lower back during Cow Pose or cranking your neck upwards. Instead, focus on lengthening the entire spine, keeping the neck as a natural extension of your back.
Modifications for Every Body
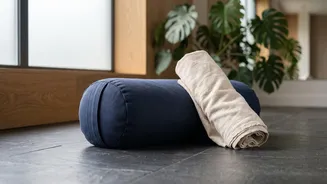
Yoga is for everyone, and poses can always be adapted. If you have sensitive knees, place a folded blanket or a pillow underneath them for extra cushioning. For those with wrist pain or discomfort, you have a couple of options. You can come down onto your forearms, or make fists with your hands and rest on your knuckles instead of flat palms. This takes the pressure off the wrist joint. The pose can even be done while seated in a chair, making it accessible during a break at the office. Simply place your hands on your knees and move through the spinal flexion and extension while seated.